Install Zabbix Server 6.0 on Ubuntu 22.04 (Jammy Jellyfish)
Install Zabbix Server on Ubuntu 22.04 (Jammy Jellyfish)
The key dependencies to running and managing Zabbix server are:
- Apache or Nginx web service
- PHP and extensions
- MySQL/ MariaDB / PostgreSQL database server
Our setup will use Apache, MariaDB and PHP on Ubuntu 22.04 Linux system. Follow the steps below to install and use Zabbix Server 6.0 on Ubuntu 22.04 (Jammy Jellyfish).
Step 1: Update Ubuntu system
Start the process by updating and upgrading your Ubuntu system.
sudo apt update && sudo apt upgrade -yOnce the system has been updated you can reboot if this is required.
[ -f /var/run/reboot-required ] && sudo reboot -fStep 2: Install Apache, MariaDB, PHP
Install Apache Web server:
sudo apt install apache2Also install MariaDB database server:
sudo apt install mariadb-server mariadb-clientInstall PHP and other extensions required:
sudo apt install php php-{cgi,common,mbstring,net-socket,gd,xml-util,mysql,bcmath,imap,snmp}
sudo apt install libapache2-mod-php
Confirm the version of PHP installed:
$ php --version
PHP 8.1.2 (cli) (built: Aug  8 2022 07:28:23) (NTS)
Copyright (c) The PHP Group
Zend Engine v4.1.2, Copyright (c) Zend Technologies
    with Zend OPcache v8.1.2, Copyright (c), by Zend Technologies
Step 3: Add Zabbix APT repositories
Next we add official Zabbix repository to our Ubuntu 22.04 (Jammy Jellyfish) system. This repo contains the latest packages of Zabbix as opposed to other methods.
sudo apt install wget -yDownload repository .deb package file:
wget https://repo.zabbix.com/zabbix/6.0/ubuntu/pool/main/z/zabbix-release/zabbix-release_6.0-4%2Bubuntu22.04_all.debInstall downloaded repository file:
$ sudo dpkg -i zabbix-release_*ubuntu22.04_all.deb
Selecting previously unselected package zabbix-release.
(Reading database ... 237793 files and directories currently installed.)
Preparing to unpack zabbix-release_6.0-4+ubuntu22.04_all.deb ...
Unpacking zabbix-release (1:6.0-4+ubuntu22.04) ...
Setting up zabbix-release (1:6.0-4+ubuntu22.04) ...
Step 4: Install Zabbix Server on Ubuntu 22.04 (Jammy Jellyfish)
With the repository added and configured, Zabbix server packages can then be installed on Ubuntu 22.04.
sudo apt update
sudo apt install vim zabbix-server-mysql zabbix-frontend-php zabbix-apache-conf zabbix-sql-scripts zabbix-agent
Enable PHP CGI:
sudo a2enconf php8.*-cgiEnsure you set correct timezone for your server.
$ sudo vim /etc/php/*/apache2/php.ini
; http://php.net/date.timezone
date.timezone = "Africa/Nairobi"
Restart apache2 web server after making the changes:
sudo systemctl restart apache2Confirm web server service is running:
$ systemctl status apache2
● apache2.service - The Apache HTTP Server
     Loaded: loaded (/lib/systemd/system/apache2.service; enabled; vendor preset: enabled)
     Active: active (running) since Wed 2022-09-28 08:35:48 EAT; 12s ago
       Docs: https://httpd.apache.org/docs/2.4/
    Process: 18602 ExecStart=/usr/sbin/apachectl start (code=exited, status=0/SUCCESS)
   Main PID: 18606 (apache2)
      Tasks: 6 (limit: 9457)
     Memory: 13.4M
        CPU: 48ms
     CGroup: /system.slice/apache2.service
             ├─18606 /usr/sbin/apache2 -k start
             ├─18607 /usr/sbin/apache2 -k start
             ├─18608 /usr/sbin/apache2 -k start
             ├─18609 /usr/sbin/apache2 -k start
             ├─18610 /usr/sbin/apache2 -k start
             └─18611 /usr/sbin/apache2 -k start

Sep 28 08:35:48 jammy systemd[1]: Starting The Apache HTTP Server...
Sep 28 08:35:48 jammy systemd[1]: Started The Apache HTTP Server.
Step 5: Configure Zabbix server on Ubuntu 22.04
$ sudo mysql -u root
Welcome to the MariaDB monitor.  Commands end with ; or \g.
Your MariaDB connection id is 31
Server version: 10.6.7-MariaDB-2ubuntu1.1 Ubuntu 22.04

Copyright (c) 2000, 2018, Oracle, MariaDB Corporation Ab and others.

Type 'help;' or '\h' for help. Type '\c' to clear the current input statement.

MariaDB [(none)]>
Create a database and user for Zabbix:
CREATE DATABASE zabbix character set utf8 collate utf8_bin;;
GRANT ALL PRIVILEGES ON zabbix.* TO zabbix@'localhost' IDENTIFIED BY 'StrongDBPassw0rd';
FLUSH PRIVILEGES;
QUIT
Import database data using the command:
sudo zcat /usr/share/zabbix-sql-scripts/mysql/server.sql.gz | mysql -uzabbix -p'StrongDBPassw0rd' zabbixEdit server configuration file and set database credentials:
$ sudo vim /etc/zabbix/zabbix_server.conf
DBName=zabbix
DBUser=zabbix
DBPassword=StrongDBPassw0rd
Restart Zabbix services:
sudo systemctl restart zabbix-server zabbix-agent apache2Also set the services to start at system boot.
sudo systemctl enable zabbix-server zabbix-agent apache2Status of started services can be checked using the commands:
systemctl status zabbix-server zabbix-agent apache2Step 6: Access Zabbix Server Web UI
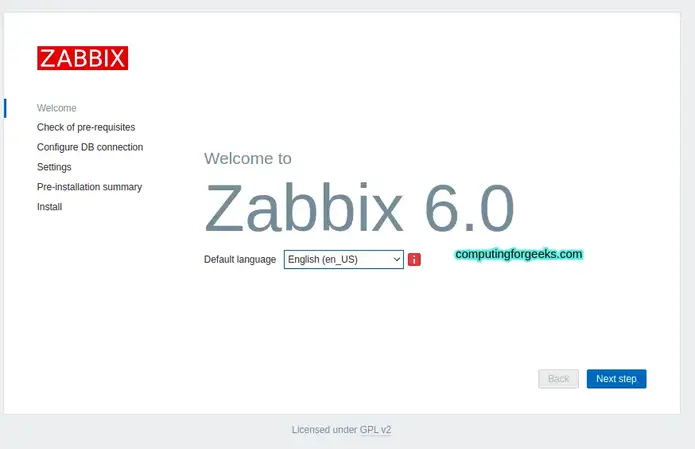
Access Zabbix UI using the URL http://SeverIP/zabbix/ or http://hostname/zabbix/

Click “Next step” to continue with configurations. Confirm all dependencies return OK in next page.

Add your database details appropriately as created in Step 5:

Set Zabbix server host name and default theme for Zabbix UI.

Confirm if configurations and are correct and proceed to finalize the process.

A congratulations message is shown if everything went ok.

The default login details are:
Username: "Admin"
Password: "zabbix"
Zabbix Frontend screenshot:

Step 7: Changing Admin user Password.
Go to Administration > Users > Admin > Password > Change Password as below.

Set your preferred admin user password and confirm. You can also update admin username in this page.
Step 8: Adding target hosts to Zabbix
A target host to be monitored by Zabbix server is added under Configuration > Hosts, you should see the localhost status enabled as below.

This means the local server is already marked for monitoring. Graphs and dashboards can be viewed under Monitoring > Hosts.