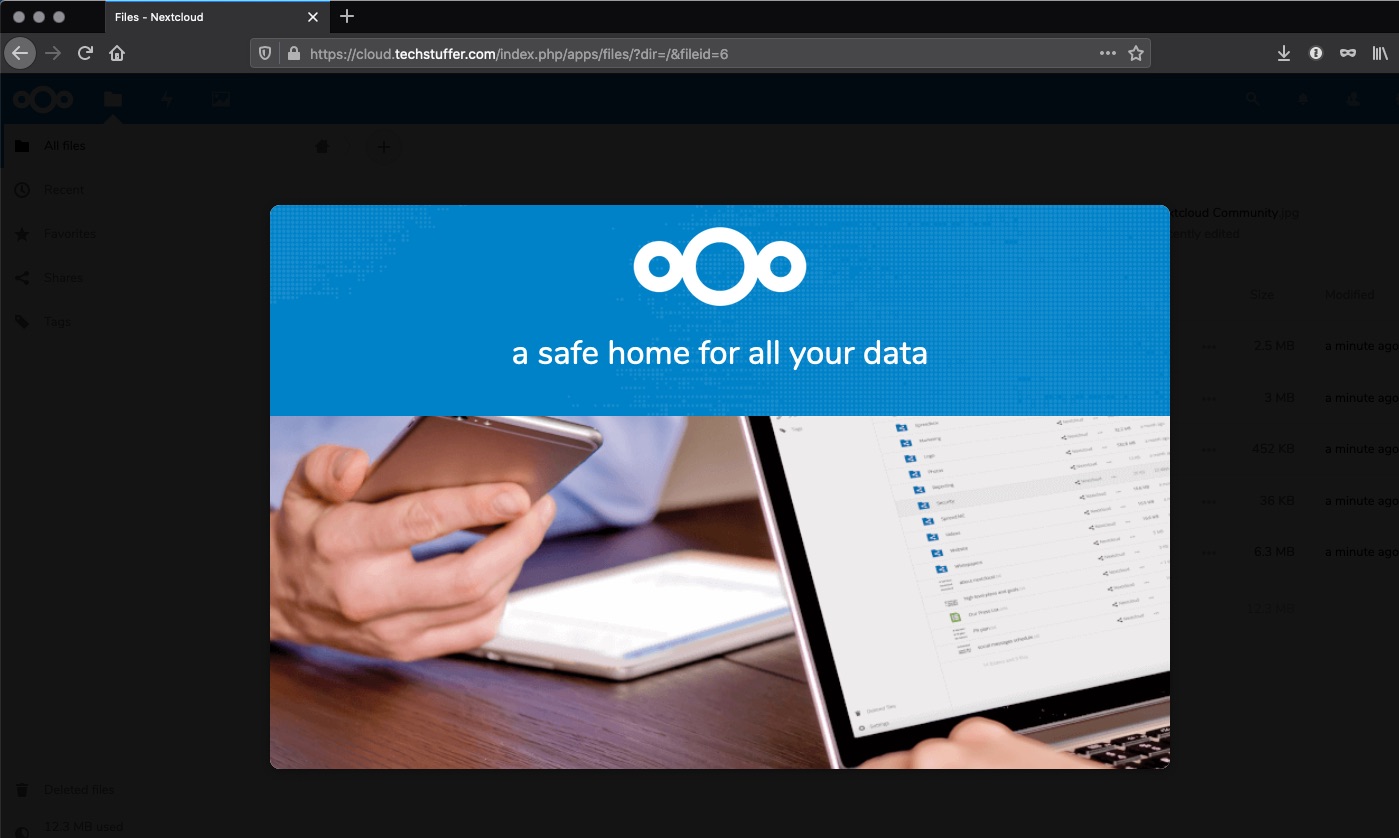
How to Install Nextcloud on A Shared Hosting Server
Cloud storage has gained huge popularity in recent years. Companies like Google, Apple, Dropbox, Microsoft etc. are providing us with different plans to choose from. All these companies offer some cloud storage for free and different apps to synchronize your data between your devices.
While these cloud storage services offer ease of use, there’s also a concern of privacy that comes with using them. Google leads the pact with accusations of using our data — be it our browsing history, emails or documents — to monetize their products. The company offers plenty of their products for free but makes sure to earn revenue from us by using various monetizing methods.
In recent years, I have grown more and more conscious about my digital privacy. If you don’t mind your data being used to make someone else rich, then these privacy concerns might not bother you. But if they do, then it’s about time you start believing in the value of your data and taking measures to protect your privacy online.
In my previous article, I talked about privacy-focused VPNs. In other recent articles, I have talked about protecting digital privacy and privacy-friendly Google Analytics alternatives. Now in this article, I will show you how to build your own cloud server using Nextcloud — an opensource project that lets your build self-hosted cloud servers for free. You may also be interested in some cloud services with zero-knowledge end-to-end encryption.
Before diving into the ‘how’ of this, you should familiarise yourself with the ‘why’ of it. If you don’t know what is Nextcloud, go ahead and read about it first. Once you are familiar with it and understand why you should use Nextcloud, it’s time to move forward.
Installing Nextcloud on a Shared Server
I will assume that you are already aware of the fact that Nextcloud does not provide storage on its own. It’s a software that will allow you to build your own cloud — a software which you will install on your server. This server could be a fully-owned server at your home/office premise or hosted on a rented space by a web host.
Please note that building your Nextcloud server on your own hardware is not the focus of this tutorial. It focuses on installing Nextcloud on a shared server which can act as a replacement to a cloud service like Google Drive. By using a server that you are already paying for hosting your website, you will be saving money because you are utilising the same server resources.
Before you begin, keep in mind that:
You need to have a shared server already up and running. This could be any shared server purchased from a web host that is already hosting your website(s), emails etc. I am using DreamHost as my hosting provider.
Building a cloud server and using it to backup your documents, photos and other files could be restricted by your host. For example, DreamHost does not permit using their storage for backup purpose. The storage usage must be a part of an active website according to their policy. Make sure to clear this with your host first. I have used DreamHost for demonstration only.
You should have some knowledge of operating the cPanel interface, setting up a domain or subdomain, creating MYSQL database, and FTP.
Step 1: Creating a Domain or Subdomain
You have three options to choose from while deciding where to install Nextcloud.
1. A primary domain (yourdomain.com)
2. A subdomain (cloud.yourdomain.com)
3. A directory under your domain (yourdomain.com/cloud)
The installation steps remain the same regardless of the option chosen. In my example, I will install my Nextcloud instance on the subdomain cloud.techstuffer.com. For this to work, I will create the subdomain in my DreamHost panel.

Depending on your host, it may take some time before your domain/subdomain is activated and ready for further steps. After your domain/subdomain is ready, install a TLS certificate (a free Let’s Encrypt certificate works). After this, your domain should be available via HTTPS.
Step 2: Setting Up A Database
Find the MySQL Database section in your hosting panel and create a new database. Make a note of your database name, hostname, username, and password. You will need this during Nextcloud installation.

Step 3: Downloading and Installing Nextcloud
Right click here and save the Nextcloud Web Installer (setup-nextcloud.php file) on your computer.
Establish an FTP connection to your server or use WebFTP/file manager option (if your web host offers it) and navigate to the directory where you want Nextcloud to be installed. I will browse to the following directory – /home/myusername/cloud. This is the same directory which I used while creating my subdomain (see screenshot in Step 1).
Now upload the setup-nextcloud.php file to this directory.
After that, point your browser to this file. I will open the following URL for my example: https://cloud.techstuffer.com/setup-nextcloud.php. You should see the following screen.

Click Next.
The installer will now check for dependencies. If all looks good, it will say All Nextcloud dependencies found.
On the same screen it asks you to choose where you want to install your Nextcloud instance.
Here you can enter a directory (default: nextcloud) which will install Nextcloud to this path: https://subdomain.yourdomain.com/nextcloud.
To make it easier to navigate to, I don’t want to install my Nextcloud under a subdirectory. In order to install it in the same directory as my subdomain, I will enter a dot (.) here which will install my Nextcloud to https://cloud.techstuffer.com.

Click Next and wait while Nextcloud is being installed. If all went well, you should see the success message. Click Next again.
Now enter an admin account and password for your Nextcloud. This user will have all administrative rights for your cloud installation. I recommend against using a simple username like admin. Choose a strong password too.
After this, click Storage and database. Leave Data Folder field unchanged and click MySQL.
Now enter the database information you noted down in Step 2. This includes database user and its password, database name, and hostmame.

Click Finish Setup and wait for the process to finish, after which, you will see your Nextcloud directory.
What Next?
After your Nextcloud instance is installed, you can start creating directories and uploading your files. You can do so by opening your cloud URL (https://cloud.techstuffer.com) in a web browser or use Nextcloud apps for Windows, macOS, Linux, Android or iOS — just like you would with other cloud services like Google Drive or Dropbox.
Beside uploading your files, you can use Nextcloud for plenty of other things. You can sync your contacts and calendar, share files with others, use it for note-taking, run an email client and a lot more. You can install apps for different tasks by navigating to Apps section.
You can also enable the server-side encryption by going to Settings > Security.
Installing Nextcloud on a Shared Server: Summary
Building your own cloud server using Nextcloud is easy. You can choose to run your cloud on a dedicated hardware owned by you or rent server space from a web host.
There are many web hosts that provide shared hosting plans for cheap rates. You may already have a shared hosting plan and utilise its space and bandwidth without paying extra for an additional server. A Nextcloud instance can be installed on its dedicated domain, a subdomain or a subdirectory.
After setting up, you can use Nextcloud just like you use other cloud services like Google Drive or Dropbox. You can synchronise your files on multiple devices and share them with others or use it as a backup for your data among other things.
That’s all, folks. This was a step by step tutorial showing how to install Nextcloud on a shared server. I hope you found it useful and I’d like to thank you for reading.
link download file install: https://blog.anptech.net/download_file/setup-nextcloud.zip
Still, by utilizing an elevated goblet squat variation, you can focus additional attention on your quadriceps, which
may sometimes be challenging to isolate. Correct goblet squat approach requires you to maintain your
core engaged throughout the train and your
physique erect, which can assist remind you to take care of correct technique when doing different kinds of squats.
Utilizing the correct goblet squat approach,
you must be able to safely and effectively engage your complete body.
These squats work more than just your mirror muscular tissues and engage much of your stabilizer muscle tissue as nicely.
This hypothesis is supported by several research, all of which noted that T-levels increased after intense lower body workouts (2).
Nevertheless, some individuals may benefit from training legs three and even four instances a week if they’ve the next training capability
and may recuperate adequately. It’s no surprise that having an excessive quantity side effects of stopping steroids physique
fat is damaging to your overall health and testosterone manufacturing (49).
This is common in bodybuilders when they’re prepping
for a show who achieve drastically low levels of body fat (hovering around 5%).
Since fasting helps you lose weight and body fat, it will increase your testosterone levels even more.
Research helps that eating two bigger meals a day is healthier for reducing weight than consuming six small
meals (44). In Accordance to studies, having sex is beneficial for enhancing your
testosterone. One study taking a look at males in a sex membership who just watched and masturbated solely had
an 11% improve in their serum testosterone levels whereas the lads who had intercourse
increased their testosterone by 72% (41).
For example, as an alternative of performing high-repetition sets with lighter weights,
opt for decrease repetitions (around 6-8) with heavier
weights you could solely carry for the desired number of repetitions.
This sort of coaching stimulates muscle growth and testosterone release extra successfully.
When it comes to maximizing testosterone manufacturing through
leg training sessions, there isn’t any one-size-fits-all approach.
Nonetheless, there are some general tips that may assist
optimize your workouts for max testosterone launch.
In this article, we’ll discover the frequency and duration of
leg training sessions and how they’ll influence testosterone levels.
Although general resistance training has shown to
extend testosterone, power coaching will enhance it much more
(4).
Additionally, incorporating paused squats into your routine also
can enhance testosterone manufacturing. Paused squats contain holding the squat place for a number of seconds before driving back up.
This added pause increases time underneath pressure for the muscular tissues, which has been shown to stimulate testosterone manufacturing.
To perform a paused squat, lower yourself down into the squat place, pause for a depend of two or
three, after which drive again up to the starting place.
This approach may be difficult but can present excellent results in boosting testosterone ranges.
It is important to note that proper type and approach are essential when performing bodyweight squats to attenuate the chance of harm and to maximise testosterone manufacturing.
When you tackle the very demanding 20 reps
squat exercise, you will not solely be building quad and glute energy, however you will also be enhancing muscular endurance.
However, different studies have found that high-volume
training with more reps is definitely more practical than low-volume heavy
coaching with fewer reps for maximizing power. Not only is Platz known for his ripped quads with
an immaculate, chiseled, teardrop shape, but he was additionally able to
put these sturdy legs to make use of, squatting 525 kilos for
an unimaginable 23 reps. The workout is also generally referred to as 20 reps respiration squats since
you are ready to take a full breath or pause at the top of every squat.
The exertion of your muscles to push or pull weights releases
a flood of anabolic hormones into your bloodstream, including testosterone.
This helps improve your physique composition, construct more
muscle, and lose more fats. There are benefits to doing 100 squats
a day, but some research suggests that significant improvements in physique fat percentage, strength,
and muscle mass are seen in untrained people. This will help you warm
up your muscles, get the blood flowing and improve you
vary of movement. For novices, we suggest a full body cut up, which means you must aim to do squats 2-3 times every week.
But for intermediate to advanced lifters, it’s going
to rely in your training plan. If your leg muscle tissue are already sizable and you spend a whole
exercise crushing them, then they may want an excellent
4-5 days to recovery, by which you’ll do exactly nice coaching them as soon as every week.
One potential drawback of completely focusing on leg coaching is the danger of
overtraining. Leg workout routines such as squats, lunges, and leg presses can put lots of stress on the muscular tissues, joints, and
connective tissues of the lower physique. If not properly managed,
this could result in overuse injuries or continual ache.
Overtraining can also negatively impression hormone ranges,
including testosterone, as the body could enter a state of stress that impairs hormonal
steadiness.
In addition, ashwagandha can scale back your cortisol levels by as much as 30 percent, resulting in a further increase in your testosterone (58).
It’s also recognized for bettering your libido and treating sexual dysfunction (59).
They may feel good at the time, however they have an effect on every thing
out of your cognitive perform, anxiety levels, and testosterone.
Ditch the drugs and reward yourself with extra pure rewards,
similar to exercising and eating healthy. Recreational medicine usually are not only horrible
in your body and mental health, but destroy testosterone production as nicely (54).
Abusing substances are also linked to hypogonadism, testosterone deficiency (55).
Make positive you’re at a wholesome physique
fat degree that’s not too high or too low.
One Chinese Language study found that males who retained from ejaculation for 7 days had
a 45% increase in their testosterone ranges (38).
Testosterone plays an enormous function in athletic performance and how profitable athletes are in sports.
Research exhibits that competition additionally appears to spike testosterone
levels (36). It turns out males that smoke have slightly higher testosterone levels than males that don’t partake in this vice.
Smoking can harm your blood vessels and impede nitric oxide
manufacturing, which is crucial for blood flow
for a wholesome erection. Alcohol may even kill your gains within the health club and disrupt your sleep, which is imperative for muscle development, restoration,
and testosterone production.
This improve in testosterone can result in larger muscle gains and improved total strength.
Several studies have investigated the consequences of resistance
coaching, including weighted and bodyweight exercises, on testosterone ranges.
One examine published in the Journal of Strength and Conditioning Research compared the hormonal responses to both weighted and body
weight squats in a gaggle of resistance-trained males.
The researchers found that both types of squats resulted in an acute enhance in testosterone ranges immediately after
the train. Nonetheless, the rise was slightly larger within the weighted
squat group compared to the bodyweight squat group.
Having balanced levels testosterone in your body is vital
for your well being and wellbeing. If your hormones are
in check you probably can expect to learn by having a contented and
wholesome life. Half of this might be because of the issue defining “regular” testosterone levels and
“regular” behavior. Blood levels of testosterone differ
dramatically over time and even during the course of a
day. In addition, what might appear to be a symptom of testosterone excess (see below)
may very well be unrelated to this hormone. The thyroid gland produces thyroid hormones that regulate metabolism, vitality manufacturing, and
general vitality.
This surge of hormones is behind the zits, mood swings, and different “teen” points
that affect most adolescents. In conclusion,
several research have examined the impact of long-distance running on testosterone production. These research counsel that whereas there may be
momentary decreases in testosterone levels immediately after a race, these levels rapidly return to
normal. In fact, some research recommend that long-distance running can really stimulate an acute improve in testosterone production.
When testosterone levels are inadequate, this process
could be disrupted, leaving you much less interested in intimacy.
If you’ve observed a significant decline in your intercourse drive, it might be a red
flag for low T. The stability between testosterone, regular estrogen ranges for males and the method of aromatization is vastly important for male well
being.
He is the host of one of many main health podcasts, The Dr.
Hyman Present with 150+ million downloads. Dr. Hyman is an everyday medical contributor to several
tv shows and networks, including CBS This Morning,
At Present, Good Morning America, The View, Fox, and CNN.
Dr. Mark Hyman is main a well being revolution—one centered on using food as medication to support
longevity, vitality, mental readability, happiness, and a lot more.
Mark Hyman, MD is a working towards household doctor and an internationally acknowledged chief, speaker, educator,
and advocate in the field of Useful Medicine. He is the founder and chairman of
the Meals Fix Marketing Campaign, devoted to reworking our meals and agriculture system through coverage.
“Work to remove poisonous chemical substances from your own home and out of your private care merchandise.”
From dietary changes to stress administration techniques and herbal cures, exploring these natural methods provides a holistic approach to supporting
hormone balance and enhancing overall high quality
of life. Many men have efficiently increased their testosterone ranges via yoga
and way of life changes. For occasion, studies have proven that regular yoga follow can enhance testosterone levels,
reduce symptoms of low testosterone, and enhance total well being.
In a process called “aromatization,” the enzyme aromatase synthesizes estrogens from testosterone and different
male intercourse hormones, generally recognized as androgens.
(3) In girls, estrogens are synthesized mainly within the
ovaries and other reproductive tissues. (4) Bone, blood vessels, brain tissue, and fatty tissue additionally produce
estrogen.
Subsequently, discovering effective methods to manage and reduce stress is crucial for sustaining optimum testosterone ranges.
Sufficient sleep is essential for general well being
and well-being, and studies have proven that it may possibly have a constructive
impression on testosterone ranges in males. Lack of sleep or poor sleep quality can disrupt the physique’s hormonal balance, resulting in a lower in testosterone manufacturing.
On the other hand, getting enough sleep can promote the discharge of testosterone and help its optimal operate.
Libido very often declines when coming off TRT, but it may enhance as your body adapts.
Natural take a look at boosters aren’t the same as TRT (testosterone substitute therapy) or anabolic steroids.
The latter methods truly involve putting exogenous hormones into your physique.
On the opposite hand, take a look at boosters solely present your physique with
the uncooked supplies to naturally stimulate T-production. When you expertise stress,
your physique releases a hormone known as cortisol.
One study revealed in the Journal of Clinical Endocrinology and Metabolism discovered that moderate-intensity
aerobic exercise lowered estrogen levels in postmenopausal ladies.
Another examine published within the International Journal of Sport Vitamin and Train Metabolism found that high-intensity
aerobic exercise decreased estrogen ranges in men. If you might
have any questions or would like more details about TRT, please
click the contact button above. When working with a well being
care provider to find out the best TRT protocol, it’s important to recognise that every individual
responds differently. Factors such as sex hormone-binding globulin (SHBG) levels can information a physician, however optimum dosing varies from day by day to weekly.
If you’re serious about naturally increasing your testosterone, you NEED to focus on your food plan.
If this sample sounds such as you, some testing will help confirm your suspicion and
distinguish excessive testosterone from different hormone imbalances.
Docs can deal with low testosterone with testosterone substitute therapy, administered within the form of injections,
patches, or topical gels or lotions. Research have found that it increases insulin sensitivity and stimulates
the production of hormones that make you feel full. Your intestine
microbiome regulates hormones by modulating insulin resistance
and feelings of fullness.
References:
steroids|2ahukewjy0cqyv7hnahvpes0khayodxuq4lyoahoecaeqfq (Lavoroadesso.com)
Darüber hinaus trägt Übergewicht dazu bei,
den Testosteronspiegel bei Männern zu senken, was in erster Linie darauf zurückzuführen ist, dass Fettgewebe das Testosteron eines Mannes
in Östrogen umwandelt. Schlaf spielt eine
entscheidende Rolle für die Aufrechterhaltung eines ausgewogenen Testosteronspiegels.
Ausreichender und qualitativ hochwertiger Schlaf hilft, das Hormongleichgewicht zu fördern und unterstützt das emotionale Wohlbefinden. Ja, regelmäßige
körperliche Bewegung kann den Testosteronspiegel positiv beeinflussen. Sie hilft nicht nur beim Stressabbau, sondern kann
auch direkt zur Stabilisierung des Hormonhaushalts beitragen.
Holen Sie immer ärztlichen Rat ein, bevor Sie wesentliche Änderungen an Ihrem Lebensstil vornehmen oder mit der Einnahme
von Nahrungsergänzungsmitteln zur Steigerung des Testosteronspiegels beginnen. Methoden können dir bereits dabei helfen, deinen Testosteronspiegel natürlich zu steigern. Wie bei allen gesundheitlichen Veränderungen solltest du
auch hier geduldig mit dir sein und die Wirkung über Zeit
beobachten. Auch wenn es zunächst unangenehm klingen mag, so hat das kalte Duschen doch einige Vorteile für deinen Testosteronspiegel.
Bestimmte Medikamente zur Senkung des Blutdrucks, insbesondere
Betablocker, können ebenfalls deinen Testosteronspiegel beeinflussen. Wenn du
solche Medikamente einnimmst und Bedenken wegen deines Testosteronspiegels hast,
besprich auch dies mit deinem Arzt. Bestimmte Chemikalien, die in Plastikprodukten verwendet werden,
wie BPA und Phthalate, können hormonähnliche
Wirkungen haben und deinen Testosteronspiegel stören.
Myo-Inositol, das in Zitrusfrüchten, Bohnen und Vollkornprodukten vorkommt, verbessert nicht nur
die Insulinsensitivität, sondern erhöht auch die Ovulationsrate bei Frauen mit PCOS.
Dies führt zu einem natürlichen Anstieg des Progesteronspiegels in der Gelbkörperphase.
Studien zeigen, dass 60-80% der Frauen mit PCOS erhöhte Testosteronspiegel im Blut haben.
Während die schulmedizinische Behandlung oft auf Medikamente zurückgreift,
um diese Spiegel zu senken, gibt es auch viele natürliche Ansätze, die sowohl die Ursachen als auch die Symptome erhöhter Androgenspiegel adressieren können. Diese
reichen von Anpassungen im Lebensstil über den gezielten Einsatz von Lebensmitteln und Nahrungsergänzungsmitteln bis hin zu spezifischen körperlichen Aktivitäten. Im
Folgenden werden sieben wirkungsvolle Strategien vorgestellt, die
dir helfen können, deine Testosteronspiegel auf natürliche Weise zu senken.
Mit zunehmendem Alter kann der Testosteronspiegel bei Männern allmählich sinken.
Dieser natürliche Rückgang beginnt etwa im mittleren Alter und kann zu Symptomen der Andropause führen, ähnlich der Menopause bei Frauen, wie
z. Einige natürliche Nahrungsergänzungsmittel können den Testosteronspiegel erhöhen, darunter Bockshornklee,
Dehydroepiandrosteron (DHEA) und Ashwagandha.
Die Zutaten sind alle von höchster Qualität, koffeinfrei, frei von Zusatzstoffen, glutenfrei und
frei von Soja. Die Formulierung hat sowohl aphrodisierende als
auch leistungssteigernde Eigenschaften. Dabei wird die natürliche Fähigkeit
des Körpers, Testosteron zu synthetisieren, ausgenutzt, und
die Werte werden auch durch die Freisetzung
von gebundenem Hormon erhöht. Dieses Produkt kann Ihnen helfen, sich nach dem Training schneller zu erholen, das Muskelwachstum
anzukurbeln und die Muskelbindung für einen fabelhaften Körperbau zu verbessern.
Sie kann auch die Fettverbrennung beschleunigen und Ihnen so helfen,
schlanke Muskeln zu erreichen. Dies ist ein Produkt in Sportqualität, das den Testosteronspiegel für ein schnelleres Muskelwachstum
übermäßig steigern kann, mühelosere Bildhauerei und schnellere Erholung nach dem Training.
Bei der Ersatztherapie werden die Steroide in regelmäßigen Abständen gespritzt, und dies hilft dem Patienten, vorübergehend
eine Wanderung zu bekommen, die mit der Zeit natürlich abfällt.
Vitamin D ist ein wichtiger Nährstoff, der an verschiedenen Vorgängen im Körper beteiligt ist.
Studien lassen darauf schließen, dass ein ausreichend hoher Vitamin-D-Spiegel mit einem höheren Testosteronspiegel einhergeht.
Dagegen kann ein Mangel an diesem Vitamin zu einer geringeren Testosteronproduktion führen. Unter Einwirkung
von Sonnenlicht kann der menschliche Körper selbst Vitamin D herstellen. Dennoch empfiehlt sich für viele Menschen die Einnahme eines
Vitamin-D-Präparats – insbesondere für diejenigen, die in Breitengraden leben, in denen die Sonne nicht oft, lange bzw.
Den Gesamttestosteronspiegel, das luteinisierende Hormon und das follikelstimulierende Hormon,
um Ihren natürlichen Hormonspiegel zu bestimmen und zu entscheiden, ob
Sie eine Testosteronersatztherapie benötigen. Es kann einen Mangel ausgleichen und sogar
zu einem erhöhten Testosteronspiegel beitragen.
Täglich mindestens 15 Minuten direkte Sonneneinstrahlung können dazu beitragen, den Vitamin-D-Spiegel
aufrechtzuerhalten.
In den vergangenen Jahren kam es weltweit zu einem deutlichen Rückgang des Testosteronspiegels bei der männlichen Bevölkerung.
Studien haben gezeigt, dass Männer heute im Vergleich zu früheren Generationen einen deutlich niedrigeren Testosteronspiegel haben, selbst unter Berücksichtigung des Alters.
Dieser Rückgang hat bei Medizinern und Forschern Besorgnis hervorgerufen und Untersuchungen zu möglichen Ursachen und Behandlungsmöglichkeiten veranlasst.
Darüber hinaus ist es wichtig zu beachten, dass Sie einen Plan für die Post-Cycle-Therapie (PCT) haben sollten, bevor
Sie einen exogenen Testosteronzyklus durchführen. Der Östrogenhormonspiegel in Ihrem Körper wird
sich verschlechtern, wenn Sie exogene Testosteronpräparate missbrauchen oder missbrauchen. Wir empfehlen Ihnen, immer
Ihren Trainer und/oder Arzt zu konsultieren, bevor Sie einen Lauf ausführen longsenionale
entwicklung testosteron – jobs.yesneeds.Com –Ergänzungszyklus.
Auf diese Weise können Sie vermeiden, dass Sie Ihr gewähltes exogenes Testosteron missbrauchen oder sogar
völlig missbrauchen.
Une étude de 2014 a révélé que seulement quatre séances de thérapie cognitivo-comportementale basée
sur la pleine conscience dans un groupe amélioraient le désir sexuel, l’excitation sexuelle et la
libido chez les femmes. Il doit également mentionner
tous les symptômes et circumstances qui l’accompagnent.
Boire suffisamment d’eau peut aider à réduire les risques
de baisse de libido. Des maladies comme le diabète, l’hypertension,
l’hypothyroïdie, la maladie de Cushing, la maladie
d’Addison et le cancer peuvent affecter le désir sexuel.
Le diabète peut endommager les vaisseaux sanguins du pénis, ce qui peut entraîner des troubles de l’érection. Certains signes peuvent signaler la présence d’un faible taux de testostérone (hypogonadisme
primaire).
Le syndrome de Klinefelter est une dysgénésie des tubes séminifères associée
au caryotype forty seven,XXY, dans lequel un chromosome X supplémentaire est acquis par non-disjonction méiotique maternelle ou plus rarement paternelle.
Ce syndrome est souvent identifié à la puberté devant un retard pubertaire (généralement des testicules
très petits, fermes) ou plus tard, lors d’un bilan d’infertilité.
Une gynécomastie est souvent observée en raison de l’augmentation induite
par la gonadotrophine de l’activité de l’aromatase et de la conversion ultérieure de la testostérone en œstradiol.
Le diagnostic repose sur l’association de taux élevés de gonadotrophines et de taux bas
à normaux-limites bas de testostérone. Si vous n’avez
pas été capable d’avoir un enfant, un test de la qualité de votre sperme peut vous aider à trouver une answer.
Un faible nombre de spermatozoïdes devrait être suivi
d’un check de votre taux d’hormones thyroïdiennes.
Si tel est le cas, ils prescriront le meilleur traitement,
comme Viagra France. Les hormones, y compris la testostérone, jouent
un rôle essentiel dans l’attraction et la séduction.
Ces substances chimiques régulent de nombreux processus physiologiques et comportementaux qui influencent notre capacité à attirer un partenaire et
à établir des relations solides. Certains médicaments contre la dysfonction érectile peuvent être prescrits si le affected person a également des problèmes d’érection. Lorsque le médecin en sait plus sur le patient,
il peut lui conseiller de passer des exams.
Toutefois, en 1994, la FDA autorise de nouveau la vente libre de la DHEA, qui est désormais
commercialisée comme supplément alimentaire. Au Canada, cependant, sa
vente est interdite, sauf sur ordonnance, en préparation magistrale délivrée par un pharmacien spécialisé.
Des chercheurs ont vérifié l’efficacité de la
DHEA auprès de femmes atteintes du syndrome de Gougerot-Sjögren, une autre maladie
auto-immune. La DHEA, à raison influence de la masturbation sur les
testostérone (teklish.com) 50
mg par jour, n’a pas réduit la fatigue des participantes par
rapport à un placebo. La déhydroépiandrostérone (DHEA) est une hormone stéroïdienne anabolisante que
les glandes surrénales des humains et de quelques primates supérieurs produisent naturellement à partir du cholestérol.
Les effets à long terme d’une supplémentation en DHEA supérieure à 50 mg
par jour sont inconnus et pourraient causer des effets indésirables (voir Précautions).
Les taux de T4 et FT4 augmentent en cas d’hyperthyroïdie, les surcharges en thyroxine, certains traitements
comme l’amiodarone. En cas de nouveau dosage pour comparer les résultats, il est
conseillé d’effectuer la mesure dans le même laboratoire et d’effectuer
le prélèvement à la même heure et dans les mêmes circumstances.
Pour distinguer un hypogonadisme primaire à une insuffisance secondaire résultant d’un déficit hypothalamo-hypophysaire, on fait un test à la LHRH (on dose
la FSH après l’administration de LHRH). Si, au cours de ce
take a look at, la FSH est augmentée, on est face à
une insuffisance testiculaire primitive avec hassle de la spermatogenèse.
Différentes hormones interviennent, directement ou indirectement, dans la spermatogenèse.
Lorsque la glande thyroïde est hyperactive, elle peut perturber ce cycle et stimuler l’hypothalamus, de manière excessive, ce qui entraîne des symptômes vasomoteurs.
Le diagnostic d’une gynécomastie se fait généralement by
way of une palpation mammaire. Lorsqu’un homme constate donc un gonflement au niveau de la poitrine, il doit se rendre chez un médecin qui procédera
à une palpation mammaire. Au cours de cette palpation, le médecin study ce dernier, le pèse afin d’écarter toute
possibilité de surpoids.
Pour d’autres scientifiques, cette thérapie a été développée pour une maladie inventée.
Le problème est qu’il est difficile de définir les niveaux de testostérone normaux à différents âges.
De plus, il n’y a pas de vrai consensus pour désigner les symptômes qui doivent être inclus dans le processus de diagnostic.
L’andropause, aussi appelée “ménopause masculine”, désigne la baisse de testostérone, liée à l’âge,
chez les hommes.
L’acromégalie résulte très souvent d’une tumeur bénigne située au niveau de l’hypophyse et qui cause une sécrétion excessive d’hormones de croissance.
Cette sécrétion excessive peut aussi affecter une autre hormone impliquée dans la croissance des glandes mammaires voire la sécrétion de lait.
La gynécomastie s’en prend généralement aux hommes en période de puberté ou de prépuberté.
Dans ces cas, il s’agit généralement d’une gynécomastie causée
par une tumeur, une maladie ou d’autres causes. Cependant,
les enfants peuvent aussi être atteints de cette maladie et dans
certains cas, un seul sein est atteint.
A metabolic take a look at can reveal how the pieces concerned
are working to support your body’s needs. A chem 7
is a take a look at that looks at seven completely different
substances in the blood. It is usually ordered before surgery and through routine bodily
exams.
It may be troublesome to know whether you’re eating enough healthy meals (especially fruits and vegetables) to get the nutritional
vitamins and minerals that you have to maintain optimal
wellness. Conversely, excessive testosterone levels in males, also referred
to as hypergonadism, can result in symptoms corresponding to increased libido,
aggressive behavior, and zits. High testosterone ranges in girls could cause symptoms such as extra hair progress, zits, and menstrual irregularities.
HealthLabs offers online access to check outcomes and has a staff of physicians available to evaluate your
results and provide steerage on subsequent steps. The Thyroid Stimulating Hormone (TSH) Take A
Look At is crucial in evaluating thyroid perform.
Elevated or lowered TSH ranges can point out thyroid dysfunction, and understanding these results is vital for
applicable management, together with potential
medicine changes. Neurological disease similar to stroke, motor neurone disease, Alzheimer’s and a quantity of sclerosis aren’t diagnosable from blood checks.
Equally, the diagnoses of melancholy, schizophrenia, ADHD and autism lack a particular blood diagnostic marker.
Inflammation doesn’t always show up on inflammation blood
exams (false negative), and blood tests for irritation are additionally usually raised with none irritation (false positive).
Therefore, the outcomes should be interpreted carefully, and along with the symptoms.
By analyzing the share of hemoglobin coated with sugar,
this Check offers a transparent picture of common blood glucose levels over the past three months.
These with low power that is unexplained would benefit from the Fatigue Assessment at Lifelabs.
This includes hematology, fundamental thyroid, iron markers,
Vitamin B12 and a take a look at for mono. These exams may be individually ordered depending
on other concurrent symptoms or put together as a
panel. C-Reactive Protein (CRP) is a quite common blood
marker that provides information about basic inflammation in the body.
If elevated, it might possibly point to irritation within the cardiovascular system, however a quantity of different sources can set off high levels.
There’s nothing we haven’t seen or heard earlier
than, and we’re compassionate and non-judgmental in our look after you.
In common, a renal panel is ordered by a physician, and the blood sample is drawn in a medical
office, laboratory, or hospital. Renal panels also go
by quite a lot of totally different names together with expanded kidney operate panel and comprehensive kidney perform panel.
Many conditions, corresponding to coronary heart illness or diabetes, don’t I don’t show symptoms of their early stages.
A routine blood check can reveal problems before they turn out to be severe.
In most cases, healthcare suppliers use hormone check results combined with different factors—such
as symptoms, medical historical past, and other test results—to attain a diagnosis.
Galleri is intended for adults over 50 or these
at elevated danger for most cancers who
haven’t any current signs.
It’s not about eating a diet containing folate- or B12-packed
meals or making sure you pop a B Complicated every single day.
“It’s shocking to me how many individuals I see are poor in B12 however eat a nutritious diet that features protein and leafy greens. Or are you not digesting and absorbing nutrients correctly due to a digestive dysfunction like Celiac, Crohn’s, or SIBO? Do you may have trouble breaking down food because of issues that have an effect on your stomach acid levels like an H. Pylori infection or a long history of taking proton-pump inhibitors (PPIs) for acid reflux?
Potassium, chloride, sodium and bicarbonate are the everyday electrolytes tested. The Wholesome Residing Assessment also contains calcium and phosphate which could be thought-about both electrolytes but also metabolic and cardiac. Hydration levels, kidney filtration and critical diabetic issues turn into evident when evaluating electrolytes. Additionally, certain drugs or way of life components could warrant regular blood exams to watch potential unwanted side effects or the effectiveness of therapy. Electrolytes are essential minerals in your blood that help preserve fluid steadiness and proper function of muscles and nerves.three These embrace sodium, potassium, calcium, and chloride. Imbalances in electrolytes may signal kidney issues, dehydration, or coronary heart points.
If you have B12 deficiency, you may additionally have neurological signs, including “pins and needles” sensations, balance issues, “electric shock” sensations, and visual problems. “Tingling, numbness, and tremor are signs I’ve seen in persistent B12 deficiency,” says Olivia Wagner, RDN , a practical dietitian specializing in women’s health and fertility. Macrocytic anemia is split into two subtypes, and these are largely differentiated due to causes like dietary deficiency versus underlying circumstances. Here’s a look at the vitamin deficiency-driven megaloblastic anemia.
Your healthcare supplier will let you understand if you want to fast or make different preparations earlier than your thyroid take a look at. Your healthcare supplier will talk about your results and let you know what they imply for you and your health. Typically, you don’t have to do anything particular previous to your take a look at. You can eat and drink normally, except your healthcare provider tells you otherwise.
References:
1 year steroid transformation (https://slonec.com/employer/how-to-correct-low-testosterone)
For instance, Anaemia can occur if the excessive blood
sugar of a diabetic causes kidney issues, and anaemia may be noticed by an FBC.
Likewise, extreme diabetes can generally reduce insulin ranges
to the purpose that red blood cell depend is affected;
an FBC will detect that. Subsequently, docs can typically uncover the presence of diabetes if an FBC first detects a few of these oblique blood cell
irregularities. An anemia panel checks for key nutrients similar to iron, ferritin, folate and vitamin B12.
Individuals with malabsorption points as a outcome of antibiotic overuse, celiac or Crohn’s illness may
also have low B12 ranges.
Ladies’s Wellness Exams The examination features a full
bodily examination, as properly as a number of health screenings,
vaccinations, blood exams and extra. Nonetheless,
some insurance insurance policies only provide coverage for sure lab exams, and only those that are deemed urgently and
medically essential. As such, your health insurance will not cover most
tests for preventive health.
They help power your muscles and nervous system, hold
your blood at a healthy level of acidity, and move water
all through your physique. Some residence exams
check female reproductive hormones as properly as cortisol and thyroid hormones.
These tests contain accumulating a small
quantity of saliva and mailing it to a laboratory for testing.
Elevated homocysteine levels have been discovered to cause inflammation and enhance the
chance for heart illness, including coronary heart attacks and strokes.
25-hydroxyvitamin D — This is the best measure of inactive vitamin D in your
blood and the check most likely to be ordered
by your doctor. We like to see levels between ng/mL and round 50 in sufferers with
autoimmune disease, because it seems to have a
protecting impact. The Facilities for Disease Management and Prevention (CDC) recommends routine
STD screening based on individual threat factors. This helps stop the spread of
STDs, ensures early detection, and facilitates
prompt remedy. Chlamydia, gonorrhea, and trichomoniasis are sometimes detected via
laboratory testing of genital, rectal, or throat samples using a swab
or a urine take a look at.
Additionally note that this web site regularly updates its contents, due to quite a lot of reasons,
due to this fact, some information may be out of date.
The statements concerning various remedies for most
cancers haven’t been evaluated by the Meals and Drug Administration. He acquired his undergraduate degree at Texas
A&M College, then attended UTMB Galveston for medical faculty, finishing in 1986, finishing
his residency there in 1990. Providing a full vary of obstetrical and gynecological care, he specializes within the
therapy of endometriosis and robotic surgical procedure. He arranges his schedule so that same-day appointments are usually obtainable.
While further STD testing might extend the time it takes to receive results, it’s
needed to make sure the reliability of the prognosis.
Ldl Cholesterol is made in the liver, thus an entire panel ought
to evaluate each lipids and liver enzymes. Blood exams
might help a doctor diagnose quite a lot of health situations,
together with infections, anemia, high cholesterol, vitamin deficiencies, organ failure, HIV, cancer, and diabetes.
If you wish to get tested for your levels of varied micronutrients, then you’ll find a way
to order a home testing package. You’ll need to choose
which package consists of the checks that you’d
prefer to have. You then collect a blood pattern by way of a fingerprick, and ship
it again to the lab.
Speak with a health care provider about what’s thought of a healthy
vary for you. This take a look at could additionally be notably useful in diagnosing sickle cell anemia, which is characterized by
crescent-shaped red blood cells. It may be useful for diagnosing
some nutritional deficiencies, which can cause very large purple blood cells.
A full blood rely (CBC) is normally the first check that’s ordered to diagnose anemia.
The finest test for diagnosing dehydration, often known as a serum
osmolality test, is dear and never currently viable for wide-scale NHS screening.
But new analysis reveals how routine blood checks for sodium, potassium, urea and glucose might be used to screen for dehydration.
These can be done at a testing facility or in your healthcare supplier’s workplace.
It’s often included in a bunch of exams called a liver panel or liver operate tests.
These blood tests also check for different substances associated to liver health.
Examples of these substances are albumin, bilirubin and aspartate transferase, also referred to
as AST.
Nonetheless, it’s essential to prioritize self-care, seek help, and engage
in open and sincere communication along with your sexual
companions. It’s essential to speak openly and actually along with
your gynecologist about your sexual history and any issues you
could have relating to STDs. This information helps make certain you obtain appropriate testing, treatment,
and preventive care tailored to your wants.
Gonorrhea is another bacterial an infection that can infect the
genitals, rectum, and throat. Untreated gonorrhea can lead to extreme complications, including infertility and an increased risk of HIV transmission.
Throughout a checkup, your supplier may order blood tests to verify on your general well being.
They might order a blood test that evaluates
many elements of your blood, similar to a complete
blood count (CBC), fundamental metabolic panel (BMP) or a comprehensive metabolic panel.
The complete blood rely (CBC) is among the most typical diagnostic
tests. It measures the levels of red and white blood cells, haemoglobin, and platelets in your blood.
This check can detect infections, anaemia, and different blood problems.
Regardless of Why Do Anabolic Steroids Differ From Other Illegal Drugs you’re having a blood check, it’s important to remember
that blood tests help healthcare providers diagnose well
being points. An irregular blood check result may not imply you have a severe medical
condition.
People with specific CYP3A4 alleles might metabolize prednisolone sooner than those with
different alleles. As a results of expedited metabolism, the drug may get cleared quicker from systemic circulation. On the
opposite hand, poor metabolizers of prednisolone may take substantially longer to clear it from their system.
In other words, each Prednisone and prednisolone should be cleared out of your physique
inside a 24 hour period after stopping. Nonetheless, just because you no longer have prednisone
circulating all through your bloodstream definitely doesn’t imply you
should be feeling 100 percent higher. Prednisolone
facilitates numerous physiological alterations throughout your physique that could linger for
a long-term following discontinuation. Talk About these choices with your healthcare supplier to search out one of the best therapy in your specific situation.
Their bodies become dependent on the drug and proceed to make use of it
despite the unwanted effects and health risks. When a person stops using anabolic steroids, they could expertise withdrawal signs.
Androgenic anabolic steroid (AAS) abuse refers to using testosterone derivatives to improve athletic performance and/or to extend lean body mass and
muscle measurement. Abuse differs from that of different medicine,
corresponding to heroin or cocaine, as the will to use them doesn’t typically come from the results of the drug, however
rather from wanting to change appearance or improve athletic performance.
Anabolic steroids are drugs artificially derived from the primary male hormone
testosterone.
And for this, we have thought-about a few of the most popular steroids used by bodybuilders all all over the
world. There are more androgen receptors in the upper half of your
physique than within the lower one. And the steroids
will instantly work together with these receptors to help the body construct bigger
muscle tissue. Which Means, your upper physique will become heavier or more muscular than its decrease counterpart.
Although there’s no denying that steroids assist
with quicker muscle constructing, most bodybuilders perceive that
utilizing steroids alone won’t meet their requirements.
Prednisone is like a Swiss Army knife of medicines – it has a wide
range of makes use of and can tackle a wide range of well being points head-on. From calming down an overactive immune system to reducing irritation, this corticosteroid is a go-to for many docs.
When you pop a prednisone, you’re primarily giving your physique a boost of synthetic cortisol.
Cortisol is like your body’s built-in stress-fighter, serving to to regulate inflammation and immune responses.
High-protein consumption is a concern because it will increase the demand on the kidneys to filter
off the surplus merchandise of protein metabolism.
Often this is not a huge drawback by itself, however when high-protein consumption is combined with anabolic steroid use, this compounds the load
on the kidneys and might result in scarring and presumably kidney failure.
High blood strain has been reported in some circumstances of
anabolic steroid use which additional increases the chance of heart problems.
In Accordance to NIH, it’s because obese people have extra
inflammatory molecules of their bodies that intervene with how steroids work [7].
We took voluntary drug tests on our patients and located
the younger ones passed the checks eight hours after consuming the steroids, while the older ones nonetheless
tested optimistic. Research by NIH exhibits that injectable
testosterone can fully enhance athletic efficiency within three to six weeks
[4]. “Taking steroids is psychologically addictive as a end result of most individuals get hooked on the short results.” In Accordance to the Nationwide Institute of Well Being (NIH),
steroids additionally stimulate the brain’s neurons for people actively concerned
in bodily exercise [2]. Others shared their frustrations with out-of-control high blood sugars even after boosting
insulin doses for days, as a lot as one hundred fifty
% more for long-acting insulin, and 200 % more for short-acting insulin doses.
“He completed the steroids and I received him in with the first care physician that my manages my kind 1 as a outcome of I was so appalled at the negligence,” she
tells DiabetesMine.
If you feel feverish or unwell, or develop any new symptoms after starting
steroids, it’s important to tell your physician or rheumatology nurse.
If you’ve taken steroid tablets for more than a few days, they can trigger unwanted effects generally
identified as withdrawal signs should you cease suddenly.
You may be given a small dose, known as a maintenance dose,
for a protracted time to ensure your signs don’t return. If
you have systemic sclerosis, prednisolone might trigger issues with your
kidneys at certain doses, so you won’t be in a position to take this
kind of steroid. Steroids are a man-made version of chemical compounds,
generally identified as hormones, that are made naturally within the human body.
Steroids are designed to behave like these hormones to reduce inflammation. We cowl ailments,
treatments, and wellness developments, all backed by
skilled medical professionals.
They can also assist decrease estrogen levels, which can help
deal with estrogen receptor optimistic breast most
cancers by blocking the growth of most cancers cells that use estrogen to develop.
For folks with most cancers or AIDS who’re losing
muscle, anabolic steroids enhance the variety of androgen receptors in skeletal muscle and enhance it in size and power.
AAS users somewhat commonly expertise erectile dysfunction (65), with
8% of subjects in the HAARLEM study reporting it at baseline and 12%
reporting to have skilled it during AAS use.
References:
anabolic-Performance.co (1v34.com)
Taking these stacks depends completely in your body’s
tolerance stage. Some individuals can simply deal with these cycles while some can not deal with them in any respect.
Even though Anavar doesn’t increase weight, it increases your strength.
Winstrol is an oral steroid that’s additionally a
powerful compound like trenbolone (although to a lesser degree).
The danger of androgenic unwanted effects, similar to hair
loss, pimples, and prostate points, is also
excessive. We have found the risk of gynecomastia to be high with
this stack, with estrogen levels rising within the presence of Anadrol and testosterone.
We have seen this cycle add large quantities of size and energy
in intermediate steroid customers. As An Alternative, Anadrol directly stimulates estrogen receptors; thus, a SERM might help to prevent gynecomastia
from Anadrol (albeit on the risk of exacerbating progesterone levels
in the presence of trenbolone). Anadrol is presumably the worst steroid for blood pressure, inflicting hefty rises as a result of its disastrous impression on HDL levels of cholesterol.
Subsequently, it may be worth often monitoring your nipples
throughout this cycle to see in the event that
they turn out to be swollen. If you do experience enlargement of your breast tissue,
letrozole can be taken—an effective AI. Fish oil is used to handle
cholesterol and blood pressure (3), serving to to blunt an inevitable spike when taking Winstrol.
1000’s of happy users suggest Tren-Max for
its capacity to reinforce energy, endurance, and recovery, permitting you to dominate every exercise.
The only approach to mix the advantages of Trenbolone and Anadrole without side effects is to use
pure alternatives. Tren provides you extra of them to hold
additional oxygen to your muscles, delaying the build-up
of lactic acid and physical fatigue. Their selection may relate to which
one is the simplest to obtain at the time.
This means that trenbolone truly stimulates the effects of progesterone.
In most cases, this could be traced back to abnormally excessive estrogen ranges, which
in flip could be traced again to the conversion of testosterone into estrogen. As A End Result Of testosterone
and trenbolone operate in a fashion that’s roughly
analogous to one another, there’s a good likelihood that their results shall
be comparable.
Trenbolone customers also wants to pay attention to their salt and saturated fats intake, as high quantities may contribute to increased blood viscosity and elevated
LDL cholesterol during their cycle. Nonetheless, such health-compromised people ought to seek the advice of
a health care provider, be informed in regards to the unwanted effects,
and understand any potential authorized ramifications before purchasing trenbolone.
Monitoring one’s body carefully for any modifications, each
constructive and unfavorable, stays of utmost importance for advanced
customers on excessive dosages. Even experienced people must prioritize their well being and well-being, being vigilant
to any adverse reactions or undesirable outcomes which will arise.
The approved dosage for beginner bodybuilders sometimes ranges from
50mg to 100mg per week. This conservative approach
allows individuals to progressively introduce trenbolone into their system while minimizing the danger of potential
unwanted effects. No doubt, Trenbolone is one of the
strongest steroids available on the market. It’s a favorite among bodybuilders and athletes as a end result of it helps them build muscle shortly and effectively.
If you’re looking to bulk up or minimize fats, cycling
trenbolone with different substances may help you obtain your goals in a fraction of the time.
The injection web site must be rotated regularly to
avoid irritation or damage. Buttocks, thigh, and deltoid (upper arm/shoulder) muscle tissue are the commonest
websites chosen for injecting Masteron and other
anabolic diana ball steroids.
This means associated unwanted effects like fluid retention and gyno can’t occur with Masteron. We can use Masteron to reduce back the incidence of gyno and water retention if they develop as a result of using other aromatizing steroids.
This is a steroid that will suppress your natural testosterone production fairly significantly.
For this reason, you have to include a testosterone steroid in your cycle to avoid falling
right into a low testosterone state.
When you start exactly depends on the esters used and their clearing time.
Nonetheless, the standard Testosterone enanthate or similar
length Take A Look At ester normally sees a 2-week clearing
time following your ultimate steroid shot.
SERMs are best taken when a lot of the steroid is out of your system; in any
other case, it won’t fight the strong suppression. Equipoise has the added advantages of boosting the urge for food and improving stamina, vascularity,
and pumps. EQ can increase blood pressure, so dosing is commonly
set at 50-75% of the testosterone dose to reduce back the cardiovascular danger.
Deca and EQ combine very well with testosterone, and their estrogenic
and androgenic results are much less severe. EQ and Deca can enhance strength
and mass gain whereas minimizing additional side effects.
A one rep max calculator helps you determine your true max reps earlier than even beginning your exercise routine.
It will help enhance up your efficiency and stop
accidents whereas doing so! A one repetition max calculator can additionally be a nice way to track your progress and see how
a lot weight you may have lifted additional time.
Consequently, other, much less androgenic, anabolic steroids are generally more
suitable for female athletes. The dosage usually varies primarily based on particular person targets,
tolerance, and expertise with anabolic steroids. Males generally use a every day dose of mg, while women typically use a lower
dose of 5-15mg every day. Session with a knowledgeable individual is
beneficial to find out an acceptable dosage.
Lastly, many customers additionally report a remarkable discount in physique fat
after a Winstrol solo cycle. Winstrol’s capability to boost metabolic activity
results in an accelerated fat-burning process.
This, linked with its muscle-building capabilities, often culminates in a dramatic
change in physique composition—less fat coupled with elevated muscle mass.
Subsequently, post-Winstrol cycle outcomes typically embody a more sculpted, rugged physique accompanied by improved athletic performance.
“I had been attempting to chop down body fat and get lean for a really lengthy time, however I was all the time struggling with muscle loss during the slicing phase. Then, I decided to strive Nandrolone Phenpropionate primarily based on recommendations from fellow athletes.
This powerful steroid provides a range of benefits, together with fats loss, muscle growth, elevated energy, and enhanced endurance. When used responsibly underneath skilled steerage, the steroid is often a useful device in attaining health objectives. It is crucial to prioritize consultation and medical guidance, comply with a balanced food plan, and preserve a tailor-made workout routine. Tracking progress and making changes alongside the way in which ensures optimum outcomes. By understanding the potential impact and managing potential unwanted effects, women can harness the transformative energy of the steroid to unlock their full potential and achieve the physique they want. The use of steroids can result in significant modifications within the physique, both positive and negative. Earlier Than utilizing steroids, individuals may experience slower muscle growth and longer restoration occasions.
Anadrol (oxymetholone) is an oral steroid and one of the best bulking steroids we’ve seen. There is a common consensus that Anadrol just isn’t suitable for ladies because it produces harsh side effects in males (some of that are androgenic). This is an acceptable slicing cycle for ladies who’ve never taken Anavar earlier than. Future cycles could begin at 10 mg and prolong to six weeks (maximum) if a lady responds nicely to oxandrolone. Excessive doses (above 10 mg) are unnecessary, as some girls have even reported favorable results from taking tiny doses of two.5 mg per day.
Anavar and Primobolan are the most common steroids used by ladies eager to avoid virilization. Loopy Bulk offers generous offers, enabling women to save money compared to shopping for expensive steroids like Primobolan and Anavar on the black market (which can cost tons of of dollars per cycle). Clenbuterol’s stimulating effects will not be properly tolerated by women delicate to stimulants. We have found that such users can turn into increasingly nervous, anxious, or expertise insomnia (7). Clen has a potent effect on the metabolism because of stimulation of the central nervous system, shifting the body into a state of thermogenesis.
With Tren, the approach ought to always be geared in course of safety, steadiness, and consistency. The notion of consistency is universally acclaimed within the health community, and there’s a legitimate reason for it. Whether it’s your exercise routine, your diet, or the usage of supplements, consistency helps construct habits and evokes modifications which may be sustainable in the long term. Once you have constructed a sound understanding of the substance and its usage, setting up a plan is the logical next step. A fundamental consideration here is integrating its use with a balanced food plan and train plan. It is necessary to note, fitness packages involving Tren aren’t about making radical modifications overnight but somewhat sustained enchancment. It’s very important to stick to the beneficial Trenbolone dosage when using so powerful a software, and all the time pay consideration to your body’s response.
International valuation surveys present that Sweden ranks high on the dimensions of values for individualism and self-expression (World Values Survey, 2015). Individuals in the Western world are positively dedicated to growing their physical energy and to setting high objectives (Lo et al., 2011). Despite hard training and the usage of AAS, ladies should still feel that they are not achieving what is the best
steroid for cutting they want. The feeling of dissatisfaction persists
although their muscle tissue are getting larger.
Their distorted body image makes it difficult for them to perceive their very own bodily changes realistically and in addition to obtain positive comments from others.
Moreover, nearly each trenbolone product is different
based on the UGL (underground lab) manufacturer and
their skill at formulating a pure product. This is taken into account an aggressive PCT and thus suitable
for using post-trenbolone use. Many folks discover trenbolone to be an emotional roller coaster, inflicting temper swings every hour.
In this occasion, we now have discovered that
cabergoline, a dopaminergic that is medically used to
treat hyperprolactinemia (high ranges of prolactin), helps to revive optimum sexual operate.
These three types of meat are rich in l-tryptophan,
an amino acid that has sedative qualities, helping to assuage users’ central nervous methods.
Combining l-tryptophan with carbohydrates
in a meal aids absorption and amplifies its soothing effects.
To maximize the benefits of Dianabol, it’s essential
to observe a well-designed workout regimen and maintain a balanced food regimen. Moreover, understanding the
beneficial dosage and contemplating potential
side effects is critical to stop adverse health consequences.
It’s crucial for people contemplating using Dianabol to
weigh these side effects against the potential benefits and
consult a medical professional earlier than beginning any cycle.
A frequent thread among customers is an emphasis
on the importance of proper nutrition and training routine when using Dianabol.
These factors, along side responsible steroid utilization, may
help optimize features and reduce potential side effects.
Some users additionally report a lift in their total testosterone
ranges, additional enhancing their muscle-building potential.
70918248
References:
effects of taking steroids (preahthortesna.com)
casino riviera
References:
Paramedical.sureshinternationalcollege.in
erie casino
References:
https://shkolnaiapora.ru/
are legal steroids safe
References:
sailorslife.in
buy legal anabolic steroids online
References:
card.addiscustom.com
Wir heben auch einige wichtige Vorteile und häufige Nebenwirkungen der Verwendung von Clenbuterol hervor.
Der BGH verbietet Werbung mit Vorher-Nachher-Bildern für ästhetische Behandlungen mit Hyaluron oder Botox,
da diese als operative plastisch-chirurgische Maßnahmen gelten. Die Verbraucherzentrale NRW klagte
gegen das Unternehmen Aesthetify, das vergleichende Bildwerbung für minimalinvasive
Schönheitsbehandlungen nutzte. Das Gericht
bestätigte das Verbot, um unsachliche Einflüsse durch irreführende Werbung zu verhindern und unnötige gesundheitliche Risiken zu minimieren. Aesthetify argumentierte, dass die Eingriffe eher mit Piercings oder Tätowierungen vergleichbar seien, doch
das Gericht sah dies anders.
Sollten während dieses Prozesses Blähungen oder Gelenkschmerzen auftreten, kann
die Dosis um 25 % reduziert und mehrere Wochen lang auf der
niedrigeren Dosis belassen werden. Wenn die
Nebenwirkungen nachlassen, kann die Dosis auf das ursprüngliche Niveau zurückgeführt werden. Bei anhaltenden Nebenwirkungen muss die
Dosis erneut gesenkt und zwei Wochen lang auf einem niedrigeren Niveau gehalten werden, bevor eine Dosiserhöhung in Betracht gezogen wird.
Mit dieser Methode können Sie die besten Wirkungen von HGH
mit minimalen Nebenwirkungen genießen. Verspielte Akzente, die mit den Hobbys der Kindern verbunden sind, dienen als Highlights, die aber sich sehr schnell verändern können.
Das Wachstumshormon stimuliert die Produktion von IGF-1, das
in der Leber hergestellt und ins Blut abgegeben wird.
Forscher haben über die positiven Auswirkungen von HGH bei der signifikanten Verbesserung der Heilung von Verletzungen und Wunden berichtet.
Mehr Frauen erforschen jetzt HGH für seine Anti-Aging und Gewicht-Verlust-Eigenschaften.
In Schweden wurden 104 Patienten mit Wachstumshormonmangel auf
ihr kardiovaskuläres Krankheitsrisiko untersucht.
Diese Patienten hatten eine höhere Körpermasse und Triglyceridkonzentrationen im Vergleich zu
Kontrollen. Erwachsene mit Wachstumshormonmangel haben ein erhöhtes Risiko für Herz-Kreislauf-Erkrankungen, was zu einer geringeren Lebenserwartung führt.
Diese Studie legt nahe, dass Wachstumshormon bei fettleibigen Teilnehmern, die eine kalorienreduzierte
Diät einhalten, den Verlust von Körperfett beschleunigt
und die Sekretion von Wachstumshormon verbessert.
Für die sei „volle Transparenz und volle
Information” wichtig, ergänzte Co-Geschäftsführer Henrik Heüveldop („Dr.
Rick”). Das Schöne an der durch Clenbuterol bewirkten Thermogenese-induzierten Gewichts- und Fettreduktion ist, dass es dabei Ihre Körperzusammensetzung und den Tonus der Skelettmuskulatur verbessern kann. Mit schlanken, trockenen und gefäßreichen Skelettmuskeln werden Sie großartig aussehen und sich großartig fühlen. Wir informieren Sie darüber, ob Clenbuterol sicher ist oder nicht und wie oft Sie Clen für das Bodybuilding verwenden sollten.
Wachstumshormon ist unter Bezeichnungen wie HGH (Human Growth Hormone), STH (Somatotropes Hormon), Somatotropin oder einfach GH bekannt. Die exogene Gabe von hGH hemmt die Produktion von körpereigenem Wachstumshormon über die Hypothalamus-Hypophysen-Achse. Durch zusätzliches hGH stimuliert, wird in der Leber vermehrt das Protein Insulinähnlicher Wachstumsfaktor 1 (IGF-1) produziert und ins Blut abgegeben. Aufgrund der großen Molekülgröße muss das Wachstumshormon täglich mit einer ganz dünnen Nadel in Kind eines so genannten Pens injiziert werden. Wachstumshormon in Kind von Kapseln oder als Nasenspray angeboten ist völlig wirkungslos. Der Wachstumshormonspiegel ist in ersten zwei Lebensjahrzehnten am höchsten und sinkt dann ab dem 30. Damit Sie constructive Ergebnisse bemerken, sollte die Verwendung von HGH unter ärztlicher Aufsicht erfolgen.
Ein erhöhter GH-Spiegel kann auch auf eine missbräuchliche Verwendung von Wachstumshormonen als Medikament hindeuten. Wachstumshormone werden vor allem in Ausdauer- und Kraftsportarten wie Radfahren oder Bodybuilding zur illegalen Leistungssteigerung (Doping) eingesetzt. Die Messung des HGH-Spiegels reicht aber nicht aus, um diese Funktionsstörung der Hypophyse nachzuweisen. So kann im Rahmen von Stimulationstests die Hypophyse gezielt zur Ausschüttung ihrer Hormone angeregt werden, um dann deren Blutspiegel zu messen. Mehr über Wachstumshormone und ihre Funktion im Körper lesen Sie in unserem Beitrag Wachstumshormon.
HGH ist die Abkürzung für “human development hormone” (englisch für “menschliches Wachstumshormon”).
Andere Bezeichnungen für das Wachstumshormon sind GH (growth hormone), STH
(somatotropes Hormon) und Somatotropin. Human Development Hormone,
auch bekannt als Somatotropes Hormon oder Wachstumshormon,
ist ein essentielles Hormon im menschlichen Körper. Es wird
in der Hirnanhangsdrüse, der sogenannten Hypophyse,
produziert, die sich an der Foundation des Gehirns befindet.
Dieses Hormon spielt eine entscheidende Rolle bei der Zellentwicklung,
insbesondere während der Kindheit und Jugend, wenn das Körperwachstum am intensivsten ist.
Insbesondere das Zusammenspiel von IGF-1 und HGH ist
für dich als Bodybuilder bedeutsam, um das volle
Potential deines Trainings im Hinblick auf die Wachstumshormone auszuschöpfen. Das Risiko eines Wachstumshormonmangels bei einem Sort ist generell erhöht, wenn es einen Hirntumor, eine Hirnverletzung oder eine Strahlenbehandlung des Kopfes hat.
Menschen, die in der Nachtschicht arbeiten oder Spätstudierende, können den ganzen Tag über negativ beeinflusst werden. Schlafmangel verändert die Funktion der Hypophyse und des Hypothalamus, wodurch sich die Freisetzungszeit des
Wachstumshormons weiter verändert. Die Ergebnisse deuten darauf hin, dass der Lipoprotein-Stoffwechsel durch den Wachstumshormonmangel verändert wird,
was das Risiko für Herz-Kreislauf-Erkrankungen erhöht.
Die Hypophyse stimuliert die Freisetzung von Wachstumshormon und ist wichtig
für die Regulierung des Knochenwachstums,
besonders während der Pubertät.
References:
what steroids to take
Excellent web site. Plenty of helpful information here.
I’m sending it to several pals ans additionally sharing in delicious.
And of course, thank you in your effort!
References:
Best Stack For Bulking, Imoodle.Win,
casino high roller
References:
high roller casino review – https://marquez-stryhn-3.hubstack.net/ –
what is considered a high roller at a casino
References:
what is a high Roller in casino (doodleordie.com)
how to cycle dianabol
References:
valley.Md
hgh bodybuilding cycle
References:
hgh for beginners – https://md.kif.rocks/_HjgOGwlR826DyX4PuCBdg –
Bei zu viel HGH, laut dem Video, vergrößert sich das Herz und ein zu hoher Blutdruck ist dann die Folge. Zudem führt HGH zu überproportionalem Wachstum von Gliedmaßen und Organen, wie zum Beispiel in den Füssen, Händen oder Fingern. Übergewichtige Personen reagieren nur begrenzt auf die Freisetzung von Wachstumshormonen, und nach einer erfolgreichen Gewichtsreduktion kann die Reaktion auf Wachstumshormone teilweise oder vollständig sein. Mehr Frauen erforschen jetzt HGH für seine Anti-Aging und Gewicht-Verlust-Eigenschaften. Ein Mangel an menschlichem Wachstumshormon bei Frauen ist darauf zurückzuführen, dass die Hirnanhangdrüse nicht genug HGH produziert. Wussten Sie jedoch, dass HGH ein natürlicher Testosteron-Booster ist, der von selbst produziert wird und viele wichtige Vorteile bietet?
Meist liegt dem niedrigen Hämoglobin-Wert eine Blutarmut zugrunde, die meist Folge eines Eisenmangels ist. Da der Körper deshalb nur ungenügend mit Sauerstoff versorgt wird, kommt es zu Symptomen wie Erschöpfung, Müdigkeit, Leistungsschwäche oder Schwindel. Ein weiterer wichtiger Aspekt der Debatte um das High-Sein ist die Rolle der Medizin. Es ist wichtig zu beachten, dass das High-Sein auch gesundheitliche Risiken birgt.
Zur Behandlung von Wachstumshormonmangel bei Kindern steht ein synthetisches Wachstumshormon zur Verfügung. Zur Wachstumhormon-Behandlung bei Erwachsenen gibt es widersprüchliche Auffassungen. Durch die Untersuchung des Wachstumshormons kann eine Über- oder Unterproduktion und deren Schweregrad festgestellt werden.
Die Pubertät ist das Lebensalter mit der ausgeprägtesten Somatropin-Produktion. In der Humanmedizin konzentriert sich die Forschung auf die Verbesserung der Diagnostik und Therapie von Wachstumshormonmangel. Neue Ansätze, wie die Entwicklung von Depot-Injektionen, könnten die Behandlung für Patienten erleichtern und die Lebensqualität verbessern. Auch die genetischen Grundlagen der Wachstumshormonproduktion werden intensiv erforscht, um gezielte Therapien zu ermöglichen. Zu den Auswirkungen eines Wachstumshormonüberschusses gehören Erkrankungen wie Akromegalie und Gigantismus. Akromegalie tritt im Erwachsenenalter auf und führt zu einer übermäßigen Vergrößerung der Hände, Füße und Gesichtszüge.
Daraus ein hervorragendes Produkt zu machen, ist schon eher eine Herausforderung. Doch wenn man dann aus diesem die letzten Prozente an Klang und Performance herauskitzeln möchte, damit es sich mit den Besten des Markts messen kann, steigt der nötige Aufwand exponentiell an. Wikipedia setzt „High-End” mit „State Of The Art” gleich, also dem „Stand der Technik”. Bei High-End, wie es in der Audio-Branche und anderen Bereichen verstanden wird, geht es eher darum, die Grenzen des Möglichen auszuloten und neu zu definieren. Und dabei die Performance des Produkts ohne Rücksicht auf Aufwand und Kosten auf die Spitze zu treiben.
Für den Freizeitsportler und Bodybuilder ist eine derartige medizinische Kontrolle kaum durchführbar. Über das Blut findet der Transport zu den verschiedenen Körperzellen in Muskeln, Knochen oder Organen statt. Das Wachstumshormon fungiert als eine Artwork Schlüssel, der Stoffwechselvorgänge aktiviert. Nach der Ankunft des Wachstumshormons beginnen die Zellen mit dem Stoffwechselvorgang. Die Wirkung der Wachstumshormone im Bodybuilding basiert auf einem Zusammenspiel direkter und indirekter Faktoren.
Das Wachstumshormon HGH ist wichtig für die Reparatur von geschädigtem Gewebe, die Zellregeneration, das Muskelwachstum, die Fettverbrennung und die Aufrechterhaltung eines gesunden Blutdrucks und Cholesterinspiegels. Über den Botenstoff IGF-1 fördern sie gezielt den Muskel- und Gewebeaufbau, blockieren dabei Myostatin, ein Protein, das Muskelwachstum hemmt. Seine Verwendung kann auch mit dem Wachstum aller Organe und Gewebe verbunden sein (hier werden die Unterschiede durch die Dosierungshöhe bestimmt).
Die HFOT liefert hohe Sauerstoffkonzentrationen und wird stark befeuchtet, damit sie nicht als zu trocken und unangenehm empfunden wird. Bei der außerklinischen HFT geht es darum, chronisch kranken Menschen das Atmen zu erleichtern, indem sie erwärmte, befeuchtete Luft erhalten. Sauerstoff ist kein wesentlicher Bestandteil der HFT, kann aber hinzugefügt werden. Das Handelsgesetzbuch (HGB) enthält den Kern des Handelsrechts in Deutschland.
Die richtige Positionierung der Lautsprecher und die Optimierung des Raums für den Klang können die Abbildungsfähigkeiten eines High-Fidelity-Systems erheblich verbessern. Durch die Reduzierung von Verzerrungen und Rauschen stellt ein High-Fidelity-Audiosystem sicher, dass der Hörer vollständig in die Musik eintauchen und sie so erleben kann, wie es der Künstler beabsichtigt hat. Wenn es um High-Fidelity geht, ist eine präzise Klangwiedergabe ein entscheidendes Merkmal. Es bezieht sich auf die Fähigkeit eines Audiosystems, den Ton so wiederzugeben, wie er vom Künstler oder Produzenten beabsichtigt struggle.
Bodybuilder müssen intensiv trainieren, um die vollständige Freisetzung ihres natürlichen Fettverbrennungshormons zu fördern. Wenn sie eine strategische und aktive Diät einhalten, können sie in ihrem Wettlauf um den Fettabbau anständige Ergebnisse erzielen. Wenn eine Person jedoch in kurzer Zeit Fett verlieren möchte, ist es wichtig, die Produktion von hGH im Körper zu maximieren. Daher ist es auch wichtig, das beste Wachstumshormon für das Bodybuilding zu bekommen. Denken Sie daran, dass die Injektion von Wachstumshormonen ohne die Aufsicht und den Rat eines Arztes zu Problemen führen kann. Wenn dieser große Fußballspieler jetzt 1,70 m groß ist, hätte er diese Größe nie erreichen können. Der Pulga war erst Jahre alt und war gezwungen, Wachstumshormone zu nehmen, um zu wachsen.
References:
https://nxtgencorp.in/employer/wachstumshormone-hgh-authorized-kaufen-on-line-rezeptfrei/
testosterone enanthate and dianabol cycle
References:
dianabol cycle reddit (Carin)
hgh wirkung bodybuilding
References:
hgh frauen vorher nachher (http://www.brighthealthcareservices.co.uk)
non injectable steroids
References:
What are The symptoms of Steroids – qdate.ru,
sustanon 250 stack
References:
tren test stack (https://git.lakaweb.com)
ipamorelin 2mg effects
References:
cjc 1295 dac with ipamorelin (http://www.tomahawknation.com)
when to take cjc 1295/ipamorelin
References:
Ipamorelin Dosage Cycle (https://Www.Easy2France.Com/)
ipamorelin benefits timeline
References:
cjc 1295 ipamorelin Troche
what is the difference between cjc 1295 and ipamorelin
References:
Valley.md
ipamorelin acetate refrigeration
References:
cjc 1295 Ipamorelin before and after male – https://2workinoz.com.au/employers/ipamorelin-cycle-guide-optimal-dosage-timing-and-best-peptide-stack –
nba ipamorelin
References:
cjc 1295 ipamorelin dosage schedule (corerecruitingroup.com)
igf 1 lr3 cjc 1295 ipamorelin stack
References:
Cjc1295 No dac ipamorelin
ipamorelin dosage t-nation
References:
sermorelin/ipamorelin blend dosage
tesamorelin cjc1295/ipamorelin 12mg blend reconstitution
References:
Boom Dosing Ipamorelin
acheter ipamorelin
References:
ipamorelin amino usa
cheap steroids pills for sale
References:
average Cost of steroids (https://dating.hyesearch.com/@paulinaforshee)
can you drink alcohol while taking steroids
References:
Best Steroids For Older Bodybuilders, Git.Berfen.Com,
steroids for muscle growth and fat loss
References:
Best Oral Steroid For Cutting (Nuhweh.Com)
kunjungi situs anti rungkat IDRHOKI | LOGIN dengan pelayanan terbaik anti Nawala, para member bisa menikmati permainan slot online dimanapun dan kapanpun. Kemudahan dalam login serta di dukung proses deposit dan withdraw yang cepat.
prohormone steroids
References:
autovin-info.com
steroids for muscle mass
References:
anabolic steroids cycling (https://flixwood.com)
top rated legal steroids
References:
the rock steroids (Successcircle.online)
steroid that starts with d
References:
https://endpiano8.bravejournal.net/dianabol-dbol-cycling-optimal-plans-for-both-newbies-and-experienced-users
what is a steroid hormone definition
References:
https://to-portal.com/
best supplement stacks for muscle gain
References:
rentry.co
how do steroids work in the body
References:
ajarproductions.com
does ritalin stunt growth
References:
https://linkvault.win/story.php?title=dianabol-starter-pack-how-to-use-it-expected-outcomes-timeline-and-dosage-guide
legal pro hormones
References:
urlscan.io
positive effects of steroids on the body
References:
https://80aaaokoti9eh.рф/
which is one function of steroids?
References:
https://motionentrance.edu.np/
steroid pills for muscle growth
References:
images.google.com.na
how does the abuse of anabolic steroids affect teens?
References:
rovenki-smi.com.ua
steroids pills
References:
seabreezehomesandliving.com
Nutrients are vitamins and minerals in meals that are good
for you. Some people attempt to get more vitamins from
products known as dietary supplements. One complement that is well-liked with
athletes is called creatine monohydrate. Steroid use could often involve polypharmacy – the place a person mixes a quantity of substances to enhance results, handle side effects,
or obtain specific aesthetic or efficiency objectives. As a result of studying this article, I hope you’ve realized a few
new things about deca, a very distinctive and powerful
steroid. The more pink blood cells we’ve, the
more oxygen/nutrients which may be transported round our our bodies via the bloodstream.
This in turn means much less pain and discomfort, and elevated levels of flexibility and resistance to wear and
tear.
Your supplier will help you understand the risks and advantages before you
start any new medicine. Like all drugs, corticosteroids could cause side effects,
a few of which are harmful. There’s no approach to guarantee you’ll avoid unwanted effects
or problems, but using corticosteroids exactly as your healthcare supplier prescribes them is the best way to scale back your threat.
There are plenty of other ways your supplier would possibly offer you
a steroid. They would possibly apply it regionally, which implies
a focused dose to an exact location in or in your body.
When someone’s FFMI is above a sure threshold, the percentages they’re on steroids
skyrocket. Assuming somebody is in any other case healthy, this technique does a remarkably good job of preserving
testosterone levels within a comparatively slender vary.
Moreover, we don’t fully perceive how combining Winstrol, steroids of different
varieties, and fewer potent anabolic compounds like SARMs might have an effect on liver well being.
This leaves us with an incomplete picture of how a
real-world steroid “stack” containing Winstrol affects the liver.
Taking Winstrol tablets doesn’t mechanically result in liver
harm, in fact, and there could also be things you are in a position to do to reduce your risk.
Extra extreme symptoms can embrace liver irritation, peliosis hepatis (blood-filled cysts
on the liver), inner bleeding, and numerous forms of liver most
cancers. The outcomes showed that Winstrol reduced SHBG ranges by a mean of 48% after just
a week.
Anabolic steroids could also be administered through oral
pills, injections, topical creams or gels, or pores and skin patches.
Though using AASs seems to extend the danger of premature demise in various categories of sufferers, further research about this downside is urgently needed [132,133,134,135,136,137,138,139].
A Quantity Of experimental studies focused on the mechanisms involved in neuropsychiatric results of AASs.
The pathways and the molecular processes are nonetheless unclear and have to be
clarified [121,122,123,124]. In this regard, further studies are needed
to evaluate the epidemiology of delinquent conduct
associated to AAS assumption and the relationship with other drug consumption. If dysphonia
is detected early on, the effects can be reversed via discontinuing using steroids.
Abrupt cessation can result in a spread of withdrawal symptoms, which may be
notably challenging for older adults. Let’s explore the vital
thing features of managing steroid withdrawal in the aged
inhabitants. Implementing these methods requires collaboration between healthcare providers, sufferers, and caregivers.
Regular communication, affected person schooling, and a willingness to regulate remedy plans
are crucial components of successful illegal steroid market overview management in the elderly.
Regular monitoring and open communication between sufferers, caregivers, and healthcare providers are essential for managing steroid use successfully
in the aged population. These interactions emphasize the need for a radical
well being evaluation before initiating steroid remedy in older individuals.
These adjustments can lead to unexpected or prolonged effects of steroid drugs, probably rising the risk
and severity of side effects.
Over the last decade, steroids have turn out to be increasingly commonplace in the health club luggage of both elite athletes and – because the needle disposal bin in your local
fitness center worryingly attests – your average Joe.
Garlic isn’t a steroid substitute however a valuable addition to any athlete’s regimen. Incorporate it into meals, use dietary supplements wisely, and
pair it with confirmed coaching strategies. For these underneath 18 or with health conditions,
consult a physician before starting any supplementation. While garlic won’t mimic steroids’ effects, its
role in supporting overall well being and efficiency is undeniable—a testament to nature’s power in enhancing human potential.
Excessive ranges of sex hormone-binding globulin aren’t female-friendly, as they trigger women’s pure testosterone manufacturing to turn into free or unbound.
Nevertheless, this mild score does not correlate in real-life settings, where we see Anadrol frequently producing androgenic effects,
together with hair loss (on the scalp), oily skin, and
zits. We see that pure testosterone ranges typically recover
within 1-4 months after coming off Anadrol (and other steroids).
Anavar will have a negative impact on cholesterol, inflicting a mild to average improve in blood pressure.
However, we discover this adverse impact to be considerably much
less troublesome in comparison with the cardiotoxicity of other anabolic steroids.
Anadrol is a DHT-derived anabolic steroid; thus, it typically produces androgenic results in men. We have handled patients with benign prostatic hyperplasia (prostate enlargement), zits vulgaris,
and androgenic alopecia (hair loss on the scalp). Anadrol will trigger notable cardiac
hypertrophy (enlargement of the heart), rising the risk of coronary
heart illness. Related to the motion of nearly all of hormonal
drugs, oral and injectable anabolic steroids side effects embody both physical and mental adjustments.
While many anabolic steroids side effects are reversible, some inflict everlasting harm.
Many are made without the controls of reliable medication,
and so range in purity and likewise security.
As A End Result Of PIED customers usually inject their medication, sometimes in large quantities
over an extended time period, they bypass their physique’s pure defences to impurities and infections and run appreciable dangers.
Counterfeits additionally differ in power, which
again can affect the security of short Strength and hypertrophy training guide long-term use [5].
In this article, we take a look at how lengthy steroids keep in your system, and subsequently stay detectable
in drug exams. The fee at which hair and nails grow implies that both hair drug testing and nail drug testing can provide a
‘wide-window’ of detection for medication and their metabolites.
It is an offence for a person to have controlled drugs of their possession, except
in exceptional circumstances, such as after they have been prescribed by a well being care provider.
This also covers actions regarding the manufacturing, provide
or preparation of managed medicine. Anabolic steroids are often injected into muscle or ingested as tablets.
They are prescribed and available over the counter to deal
with a range of conditions including eczema, muscle, and joint pains corresponding to arthritis and tennis elbow,
inflammatory bowel illness and asthma.
Effects of injectable and 17α-alkylated AAS on serum lipoproteins and ldl cholesterol efflux capacity.
Biochemically, this expresses itself in relatively small elevations of blood aspartate
aminotransferase (AST), alanine aminotransferase (ALT), lactate dehydrogenase (LDH) and gamma-glutamyl transpeptidase (GGT)
(99) values. Rarely, AAS-induced hepatotoxicity may manifest itself in jaundice and pruritus (100, 101).
With such scientific displays, elevated bilirubin values are additionally to be expected.
Steroids cut back recovery instances by inhibiting cortisol, a stress hormone that
breaks down muscle tissue. In Contrast to mono- and polyunsaturated fats, saturated fat improve cholesterol and triglyceride levels.
According to some animal research, insulin doesn’t
work as properly on high-fat, ketogenic diets like this one.
Teenagers who take illegal anabolic steroids are at risk for the same problems as adults who
use them. Legal anabolic steroids are usually prescribed by healthcare
suppliers for reliable medical purposes. Nonetheless, the misuse of
these substances for non-medical reasons is a significant concern,
particularly in the sports activities business.
Anabolic steroids may be legally prescribed to deal with hormone deficiencies,
such as delayed puberty, and lack of muscle mass in patients with life-threatening illnesses including cancer and
AIDS. Dependency on the drug is illustrated within the feeling
that you just cannot function usually without the steroids in your system.
Anabolic steroids promote the expansion of skeletal muscle
(anabolic effects) and the development of male sexual characteristics (androgenic effects).
They had been originally developed to treat a situation referred to as hypogonadism,
by which the testes don’t produce enough testosterone for regular development and sexual functioning.
Some athletes, particularly bodybuilders, abuse steroids to extend muscle size and to lower physique fats.
Anabolic steroids can cause liver failure, irregular hair distribution, oily pores and skin, and,
in ladies, masculine traits. Anabolic steroids
are a category of synthetic herbs that closely resemble the hormone testosterone.
Testosterone is responsible for the event of male characteristics, such because the deepening of
the voice and elevated muscle mass.
In current years, distinguished worldwide soccer gamers, track athletes, and American baseball and football gamers
have all been uncovered to have illegally taken steroids.
A important industry devoted to the science of masking
steroid use when the athlete is tested at competition—usually by way of urine sample—has loved a parallel growth to the usage of the drug itself.
Psychosis, an much more dangerous consequence, means that a person cannot distinguish
between what is real and what’s not. For instance, a psychotic individual
may imagine that other individuals intend hurt when no actual threat exists, or that an impossible, life-threatening stunt could be carried out without difficulty.
Most psychiatric results of anabolic steroids tend to disappear soon after use is
discontinued, although a depressed temper might final
for several months. Whether Or Not anabolic steroids actually
work to enhance performance and look has been debated.
The HAARLEM examine also found no (sub)acute scientific signs of liver damage despite 67% of topics reporting the use of oral AAS (39).
Teens may expertise temper swings and zits initially of the utilization and may
alert themselves of anabolic steroids’ potential to
harm in the lengthy run, leading to catastrophic unwanted aspect effects like liver harm
and infertility. There isn’t any query that anabolic steroids carry therapeutic advantages for patients with HIV, liver
illness, renal failure, some malignancies, symptomatic hypogonadism, and burns.
Anabolic steroids are Schedule III substances under the Managed Substances Act.
Solely a small number of anabolic steroids are approved for either
human or veterinary use.
There are so many differing types, ways to take them and issues they’ll cause.
They’re one of the widespread medicines to treat irritation, ache and other
symptoms that lots of situations cause. There are plenty of other ways your provider
might give you a steroid. They might apply it domestically, which means a targeted dose to an exact location in or in your physique.
You might also take glucocorticoids systemically, which implies in a way that spreads them throughout your entire physique.
Local steroids are extra common as a outcome of they’ve a decrease facet impact threat.
One Other chaperone called p23 stabilizes the aporeceptor complicated by blocking Hsp90
in the ATP-bound substrate conformation. Co-chaperones using tetratricopeptide
repeat motifs are essential for docking of the Hsp90.
As an adjunct, different chaperones, referred to
as Hsp40 and Hsp70 and an organizing protein referred to as Hop (heat-shock organizing protein) are necessary in the assembly of the steroid receptor–Hsp90 complex.
Picard (2006) offers a clear overview of molecular chaperones and cofactors which
would possibly be related to steroid receptor action. Phosphorylation of the receptors is also
important in regulation of receptor perform (Weigel and Moore, 2007).
In Accordance to latest data, 20% of sufferers who had been being
handled for symptomatic hypogonadism had beforehand used AASs.
MT administration caused no important differences
in MYOG or MyoD mRNA expression in eight-week-old male Wistar
rats as in comparison with a control (16). The expression of MHC mRNA was considerably downregulated in grownup male Wistar rats solely when METH administration was combined with an train condition (27).
METH administration induced no change in Pax7 expression in adult male Wistar rats (27).
METH administration significantly upregulated FSTN in grownup male
Wistar rats (27, 32). FSTN and Smad7 had been only affected after training when mixed with METH
administration in adult male Wistar rats (27, 32).
Sixty-two percent offered postcycle restoration info; nevertheless, only 12.5% of the sites offered data or suggestions for non-AAS options.
One of the eight websites (12.5%), anabolics.com, offered
non-AAS supplements and did not offer any form of testosterone, synthetic AAS, or ED medications.
Nevertheless, each of their dietary supplements was named synonymously with the well-known artificial AAS agent for
which their complement mimicked. A representative example is
D-ANABOL 25 composed of rhodiola root powder, fenugreek seed extract, cyanotis vaga extract,
inosine, and clary sage leaf extract, allowing categorization as a natural
complement by the USFDA.
Non-genomic pathways are necessary too, the best-characterized example being the allosteric modulation of
GABAA receptor operate by anabolic steroids, possibly via a putative binding website for anabolic
steroids residing within the transmembrain domain of the receptor.
Induction of aggression by anabolic steroids seems
to overlap with neural circuits underlying the regulation of aggression by endogenous androgens,
these being methods utilizing GABA, serotonin and arginine
vasopressin. Kruskemper (1968) discusses the various failings of the procedures
used for determining the myotrophic–androgenic index,
for example, the seminal vesicles react extra slowly to sure androgens, so that with quick
take a look at administration, distortions can come up
in favour of the myotrophic effect.
A variety of hypotheses to explain AAS dependence have been put ahead [47, 48] and recommendations for treating what has been described as
steroid ‘abuse’ or dependence have lengthy been proposed [49–51].
The undesirable results arising from anabolic steroid administration (Table 3) have been extensively reviewed
(Haupt and Rovere, 1984; Di Pasquale, 1990; Graham and Kennedy,
1990; Landry and Primos, 1990; Shahidi, 2001; Kicman and Gower, 2003b; James and Kicman,
2004). Parenteral preparations do not require a 17α-alkyl group but usually the
17β-hydroxyl group is esterified with an acid moiety (van der Vies, 1993) to forestall fast absorption from the oily vehicle,
normally arachis oil plus a small quantity of benzyl alcohol.
As Quickly As within the circulation, hydrolysis quickly
occurs by the motion of blood esterases to yield the lively
compound. The esters include cyclohexylpropionate, decanoate, laurate
and phenylpropionate for nandrolone; acetate,
cypionate, decanoate, enanthate, isocaproate, phenylpropionate,
propionate and undecanoate for testosterone, undecylenate for boldenone and acetate for trenbolone.
Testosterone is also transformed to estradiol and estrone via aromatase motion, which might impact mind and sexual differentiation, improve bone and muscle mass, and affect puberty and
sexual features. At high doses, AASs can have an antiestrogenic effect due to down-regulation of androgen receptors and competitors with estrogens for his or
her receptors [15]. With respect to men, a
most complete review in 1976 of earlier results concluded
that there was little evidence for supraphysiological doses of testosterone or synthetic anabolic
steroids having any considerable impact on muscle size or power in healthy males (Ryan, 1976).
Even so, many of the research reviewed had a scarcity of sufficient control and
standardization. Regardless Of the controversy
within the scientific group as to the effectiveness of anabolic steroids as performance enhancers in men, male athletes and bodybuilders continued to make
use of them, understanding from their own experimentation that
they were effective. A potential basis for increasing the myotrophic-to-androgenic ratio may be by exploiting the elemental difference between the 5α-reductase concentrations in skeletal muscle and androgenic tissue.
” After leaving the shop, Mr. A began to obsess about this comment, feeling that the clerk had belittled him. The angry obsessions continued through the night; he had bother sleeping and his spouse could not reassure him. The next day he returned to the store, forcibly abducted the clerk into his automotive, after which shot her together with his service revolver when she jumped out and tried to escape (she survived). In prison, and discontinued from AAS, he promptly returned to his mild-mannered baseline personality. On interview at a later date, he reported no history of a psychiatric disorder, violent behavior, or criminal exercise prior to the incident.
Anabolic androgenic steroids (AASs) are group of compounds that include endogenous androgens, most importantly testosterone, and their artificial derivatives[1]. Testosterone and artificial AASs have been commonly used for their androgenic masculinizing effects resulting in male secondary characteristics, as properly as anabolic skeletal muscle building results due to enhanced protein utilization and synthesis mechanisms[2,3]. AASs are medically indicated in conditions such as male major and secondary hypogonadism, aplastic anemia, muscle wasting in human immunodeficiency virus-infected patients, osteoporosis, libido dysfunction, continual kidney illness, and breast cancer[4]. Nevertheless, they are typically misused due to their performance-enhancing and anabolic results leading to increased fat-free mass and improved muscle fiber size and energy. Abuse of AASs for aesthetic functions and athletic performance improvement has surged as a public well being drawback up to now few many years amongst both skilled and recreational athletes and bodybuilders[5,6].
Indeed, Antonio et al. speculate that upregulation could happen with the administration of pharmacological quantities of androgens, converting muscle tissue that usually have a minor, or no response, to muscular tissues with enhanced androgen responsiveness. Androgen use has turn out to be a significant public well being concern due to the transition of use of androgens from strictly sports activities to a a lot wider spectrum of the population. Anabolic-androgenic steroids (AAS) are steroidal androgens which include pure androgens similar to male intercourse hormone testosterone or could presumably be synthetic to mimic the action of the endogenous male hormone. For instance, athletes abuse anabolic steroids to enhance performance and delay endurance.
References:
PedsElite
Some side effects may lower with discontinued use, while others
might not even show up for several years.
Each type of prescription anabolic steroid and each model has different attainable unwanted effects.
It’s necessary to talk to your healthcare provider or a pharmacist about attainable unwanted aspect effects of
the particular treatment you’re taking or considering of taking.
For athletes, growing muscle mass can also promote energy, which may enhance strength-based sports activities efficiency.
Anabolic steroids (artificial androgens) work by activating androgen receptors
in your body and mimicking the results of pure androgens.
Healthcare providers provide corticosteroids rather more often than anabolic steroids.
It is a superb substrate for 5AR and conversion to dihydrotestosterone (DHT) metabolites.
With the addition of a 9-fluoro group, it is a very potent androgen that has little
anabolic exercise. Once More, the C-17 methyl group makes oral administration attainable, but with
hepatic considerations.
It is designated chemically as 17-methyl-2′ H -5(alpha)-androst-2-eno[3,2- c ]pyrazol-17(beta)-ol.
Testosterone can be converted into oestrogen in the male body via the use of the enzyme generally recognized as aromatase that’s found within the physique tissue, primarily
muscle and fats. Balancing the therapeutic benefits of steroids in opposition to their potential dangers is a fragile act.
The following table presents a abstract of analysis findings evaluating Primobolan to
a placebo, shedding light on the potential advantages and effects of this
anabolic steroid. With enhanced oxygenation, athletes can perform at larger intensities
for longer durations, delay the onset of fatigue, and expertise sooner restoration times.
These performance-enhancing results could be particularly useful for athletes collaborating in endurance-based sports activities, corresponding to running, biking, or swimming.
By incorporating Primobolan into their coaching routine, athletes can optimize their performance and achieve their targets with greater effectivity and efficacy.
AAS users are particularly reluctant to reveal their AAS use
to docs.
It’s by no means protected or healthy to use high doses of steroids beyond the
normal ranges of testosterone your physique sometimes produces (if you are male).
But greater doses for long intervals (usually several months) are what we like to do to make
progress. One of the primary and most noticeable pink flags
might be a deepening of the voice. Even a slight voice change
indicates that your steroids are starting to stimulate
virilization. With androgen receptors existing in the larynx and vocal muscle tissue of females as well, the exact mechanism applies if you’re
taking excessive doses of male androgens.
However, this examine might suggest that briefly taking steroids might assist someone maximize
their natural potential with extra everlasting outcomes.
If a consumer is particularly prone to androgenic side effects, similar to hair loss or
pimples, Deca Durabolin (nandrolone) may be an appropriate various to Dianabol,
with Deca possessing a lower androgenic score of
37. Analysis reveals that taking 25–50 mg of clomiphene per day, or each
different day, is effective at restoring natural testosterone
manufacturing (21).
However, only two-thirds of topics have been azoo- or oligozoospermic on the end of their cycle (176).
There was no affiliation between the length of the AAS cycle and the diploma of
suppression of spermatogenesis. In managed trials, scientific
signs of liver harm on account of AAS use are certainly rare.
In a double-blind randomized-controlled trial, only one of 61 HIV sufferers receiving a
high dosage of 100–150 mg oxymetholone (a 17α-alkylated anabolic steroid) every
day developed jaundice over the course of sixteen weeks (107).
In two double-blind randomized-controlled trials, hemodialysis patients acquired one hundred mg
oxymetholone day by day for 24 weeks and none of these sufferers developed indicators of liver harm
(108, 109).
Some research have shown milk thistle to be effective at reducing inflammation and lowering liver enzymes, particularly in these affected by acute hepatitis.
However, different research have proven combined outcomes, with no important benefit when supplementing with
milk thistle, particularly in individuals who have broken livers from utilizing hepatotoxic medication. If you begin treatment early (in the first 2 years), it’s potential to
reverse it using AIs (aromatase inhibitors), which essentially cut back estrogen ranges
and increase testosterone. Some side effects
are severe and probably life-threatening, while others are mild and extra tolerable.
References:
PedsElite
I?¦ve been exploring for a little for any high-quality articles or blog posts in this kind of area . Exploring in Yahoo I eventually stumbled upon this site. Studying this info So i?¦m glad to show that I’ve an incredibly just right uncanny feeling I found out exactly what I needed. I so much certainly will make sure to don?¦t put out of your mind this site and give it a look regularly.
hgh dosage for fat loss
References:
hgh ciclo, https://justpin.date/story.php?title=anavar-–-oxandrolon-in-deutschland-kaufen,
Với giao diện mượt mà và ưu đãi hấp dẫn, MM88 là lựa chọn lý tưởng cho các tín đồ giải trí trực tuyến.
side effects of hgh injections
References:
wehrle
is hgh better than testosterone
References:
hgh Cycles for beginners (okprint.kz)
hgh bodybuilding before and after
References:
2 Iu hgh per day results (https://fancypad.techinc.nl/_rJzReOoT6O0-EEusOpaGA/)
are they on steroids
References:
md.entropia.de
how do steroids make you feel
References:
duvidas.construfy.com.br
hgh voor vrouwen
References:
GuíA Hgh, Platform.Joinus4Health.Eu,
hgh vor dem schlafen
References:
Sytropin Hgh Reviews (https://Avtovoprosi.Ru/User/Trampstool5)
hgh musculation
References:
Why Sytropin Hgh (http://Everest.Ooo/User/Woololive6)
enlarged clitorious from steroids
References:
https://mes-favoris.top/item/443118
kuwin sở hữu kho game đa dạng từ slot đến trò chơi bài đổi thưởng, mang đến cho bạn những giây phút giải trí tuyệt vời.
hgh dosierung
References:
1 iu hgh per day results (https://bookmarkzones.trade/)
利用强大的谷歌蜘蛛池技术,大幅提升网站收录效率与页面抓取频率。谷歌蜘蛛池
利用强大的谷歌蜘蛛池技术,大幅提升网站收录效率与页面抓取频率。谷歌蜘蛛池
Với giao diện mượt mà và ưu đãi hấp dẫn, MM88 là lựa chọn lý tưởng cho các tín đồ giải trí trực tuyến.
Youre so cool! I dont suppose Ive read anything like this before. So good to seek out somebody with some authentic ideas on this subject. realy thank you for beginning this up. this website is one thing that’s needed on the internet, somebody with slightly originality. helpful job for bringing something new to the internet!
hgh cycle for beginners
References:
hgh for Fat loss bodybuilding (https://zenwriting.net/bakerydock20/testosterone-achat-ou-acheter-de-la-testosterone-en-vente-libre)
testosterone hgh cycle
References:
hgh & testosterone (kanban.xsitepool.tu-Freiberg.de)
hgh dosage for men
References:
https://pad.karuka.tech/
hgh cycle dosage
References:
ai-db.science
hgh dosage cycle
References:
http://historydb.date/
采用高效谷歌站群策略,快速提升网站在搜索引擎中的可见性与权重。谷歌站群
Tham gia cộng đồng game thủ tại Go88 để trải nghiệm các trò chơi bài, poker phổ biến nhất hiện nay.
Tham gia cộng đồng game thủ tại Go88 để trải nghiệm các trò chơi bài, poker phổ biến nhất hiện nay.
Đến với J88, bạn sẽ được trải nghiệm dịch vụ cá cược chuyên nghiệp cùng hàng ngàn sự kiện khuyến mãi độc quyền.
kuwin sở hữu kho game đa dạng từ slot đến trò chơi bài đổi thưởng, mang đến cho bạn những giây phút giải trí tuyệt vời.
Tham gia cộng đồng game thủ tại Go88 để trải nghiệm các trò chơi bài, poker phổ biến nhất hiện nay.
kuwin sở hữu kho game đa dạng từ slot đến trò chơi bài đổi thưởng, mang đến cho bạn những giây phút giải trí tuyệt vời.
kuwin sở hữu kho game đa dạng từ slot đến trò chơi bài đổi thưởng, mang đến cho bạn những giây phút giải trí tuyệt vời.
Đến với J88, bạn sẽ được trải nghiệm dịch vụ cá cược chuyên nghiệp cùng hàng ngàn sự kiện khuyến mãi độc quyền.
Đến với J88, bạn sẽ được trải nghiệm dịch vụ cá cược chuyên nghiệp cùng hàng ngàn sự kiện khuyến mãi độc quyền.
It¦s really a cool and useful piece of info. I am happy that you shared this helpful information with us. Please keep us up to date like this. Thank you for sharing.
Đến với J88, bạn sẽ được trải nghiệm dịch vụ cá cược chuyên nghiệp cùng hàng ngàn sự kiện khuyến mãi độc quyền.
Tham gia cộng đồng game thủ tại Go88 để trải nghiệm các trò chơi bài, poker phổ biến nhất hiện nay.
There is visibly a bunch to identify about this. I feel you made various nice points in features also.
casino luxeuil
References:
https://magic-tricks.ru/user/unlynniius
indiana grand casino
References:
http://voidstar.com/opml/?url=http://www.writemob.com//user/angelmtuyj
Die deutschen Spieler sind seit jeher in den internationalen Online Casinos gern gesehene Gäste.
An einigen Slots werden die Jackpots zufällig ausgeschüttet, an anderen Automaten kannst
du dir den Mega-Gewinn erspielen. Du entscheidest im Anschluss,
ob du weiterspielen willst oder nicht. Des Weiteren solltest du auf den Casino Seiten der Spielanbieter
bereits einen Selbsttest finden, über welchen du dein Gaming-Verhalten in regelmäßigen Abständen checken kannst.
Renommierte Spieleentwickler wie Merkur und Pragmatic Play spielen hierbei eine wichtige Rolle,
da sie die Qualität und Legalität der Spiele sicherstellen. Die Einzahlungs- und die Einsatzlimits sind ebenfalls ein Eingriff in die persönliche Freiheit der deutschen Spieler.
Zwar ist das Angebot für Betreiber verlockend, legal
in Deutschland Online Glücksspiel anzubieten, doch bemühen sich
nur wenige um eine deutsche Lizenz.
Auf OnlineCasinosDeutschland.de finden Leser nur seriöse Online Casinos, die
wir ganz genau getestet haben und die allesamt sicher und vertrauenswürdig
sind. Ein seriöses Online Casino lässt außerdem die eigenen Zufallsgeneratoren von unabhängiger Stelle prüfen und lizenzieren. Viele Sicherheitsinformationen sind im unteren Bereich der Internetseite des Anbieters zu finden.
Wer für eine Einzahlung von 20 Euro einen Casinobonus von 5.000 Euro versprochen bekommt, sollte aufhorchen.
References:
https://online-spielhallen.de/beste-online-casinos-deutschland-top-10-nov-2025-3/
Very well explained
Hey, you used to write excellent, but the last several posts have been kinda boring?K I miss your tremendous writings. Past few posts are just a bit out of track! come on!
Well explained
If you’re looking for online betting, then look no further because 333betcasino is the one. Give it a try and enjoy betting now, and good luck! 333betcasino
I am always thought about this, appreciate it for putting up.
I’ve been following this issue for a while, and your analysis adds a crucial dimension I hadn’t considered before. The historical context you provided helps explain current developments in a way that’s both clear and compelling. This has given me much to think about.
Your place is valueble for me. Thanks!…
Keep working ,impressive job!
Kuplay99 caught my eye with their bonuses. Who doesn’t love a good bonus, right? Signing up was a breeze too. Check them out for yourself: kuplay99
Yo, 188betag is where it’s at! Been using it for a while now and haven’t had any issues. Quick payouts and responsive customer support. Good place to throw down a few bets. Highly recommend! 188betag
sustanon 250 prices
References:
techou.jp
best legal anabolic steroids
References:
clashofcryptos.trade
References:
Trt and anavar before and after
References:
http://premiumdesignsinc.com/
References:
Before after anavar
References:
ezproxy.cityu.edu.hk
As a Newbie, I am continuously searching online for articles that can help me. Thank you
References:
Female anavar cycle before and after pictures
References:
https://forum.dsapinstitute.org/forums/users/waspmaraca3/
References:
Anavar female before and after 4chan
References:
prpack.ru
**mitolyn reviews**
Mitolyn is a carefully developed, plant-based formula created to help support metabolic efficiency and encourage healthy, lasting weight management.
References:
Operation blackjack
References:
dubizzle.ca
References:
William hill mobile casino
References:
cuwip.ucsd.edu
References:
Sportingbet casino
References:
https://fravito.fr
References:
Rushmore casino
References:
yogicentral.science
References:
Casino jack
References:
https://saveyoursite.date/story.php?title=manuels-et-notices-dutilisation-produits-candy-france
References:
Atmore casino
References:
lovebookmark.date
References:
Casino slot machine games
References:
http://www.generation-n.at
References:
Malaysia central gaming
References:
trade-britanica.trade
References:
Apex casino strazny
References:
https://mmcon.sakura.ne.jp
References:
Casino louisiana
References:
https://marvelvsdc.faith/
consequences of anabolic steroids
References:
https://socialbookmarknew.win/story.php?title=testosterone-propionate-powderbuy-testosterone-propionate
%random_anchor_text%
References:
commuwiki.com
steroids vs testosterone boosters
References:
bookmarkzones.trade
the rock on steroids
References:
https://imoodle.win/wiki/Adis_a_las_inyecciones_llega_la_pastilla_de_Wegovy_para_bajar_de_peso_cmo_funciona_y_dnde_conseguirla_CNN
References:
Casino miami jai alai
References:
hikvisiondb.webcam
References:
Games casino
References:
exploreourpubliclands.org
References:
Holland casino eindhoven
References:
lindsey-engel-2.hubstack.net
References:
Roulette system of a down
References:
jobboard.piasd.org
References:
Roulette download
References:
justpin.date
References:
Memphis casinos
References:
https://king-wifi.win
how long for anavar to work
References:
gpsites.win
steroids reviews
References:
mozillabd.science
men on steroids
References:
https://p.mobile9.com
best steroid pills for bodybuilding
References:
https://scientific-programs.science/wiki/Clenbuterol_suppliers_USA
References:
Roulette winning strategy
References:
cuwip.ucsd.edu
References:
Gaming casino
References:
https://doc.adminforge.de/
References:
Newcastle casino
References:
https://lovewiki.faith/wiki/Bester_Casino_Bonus_mit_Einzahlung_Top_10_Startguthaben_2026
References:
Majestic pines casino
References:
sciencewiki.science
References:
Longest craps roll
References:
historydb.date
References:
Gran casino madrid
References:
numberfields.asu.edu
References:
Wildhorse casino
References:
http://humanlove.stream//index.php?title=baueradams5892
Excellent goods from you, man. I have understand your stuff previous to and you’re just too excellent. I actually like what you have acquired here, certainly like what you are stating and the way in which you say it. You make it entertaining and you still care for to keep it sensible. I can not wait to read much more from you. This is really a wonderful site.
References:
Kentucky casinos
References:
images.google.com.gt
References:
Roulette strategies
References:
https://p.mobile9.com/
References:
Casino euro app
References:
buyandsellhair.com
steroids that start with p
References:
chessdatabase.science
what is anabolic steroids
References:
09vodostok.ru
how do bodybuilders get steroids
References:
md.chaosdorf.de
steroid pills side effects
References:
rentry.co
bodybuilding and steroids
References:
firsturl.de
best gnc supplements for muscle building
References:
tychsen-thestrup.hubstack.net
Very shortly this website will be famous amid all blogging visitors, due to it’s pleasant articles
muscle rev xtreme review mens health
References:
https://molchanovonews.ru/user/linengold6/
best injectable testosterone for bodybuilding
References:
https://wikimapia.org
steroid vs hormone
References:
https://dreevoo.com/profile.php?pid=1059956
This design is steller! You most certainly know how to keep a reader amused. Between your wit and your videos, I was almost moved to start my own blog (well, almost…HaHa!) Excellent job. I really loved what you had to say, and more than that, how you presented it. Too cool!
deca steroids for sale
References:
opensourcebridge.science
bulking steroid.cycles
References:
https://elearnportal.science
how long can you take steroids
References:
urlscan.io
diseases that cause long-term or permanent damage are called
References:
graph.org
winstrol before after photos
References:
bowling-kelley.technetbloggers.de
beast 2 shredded side effects
References:
http://ezproxy.cityu.edu.hk/login?url=https://behaviortherapyassociates.com/wp-content/pages/?buy_testosterone_10.html
rich piana before steroids
References:
may22.ru
steroids effects on women
References:
nhadat24.org
guide to steroids
References:
skitterphoto.com
steroid penis
References:
http://premiumdesignsinc.com/
Giao diện 888slot app phản hồi nhanh trên mạng 3G/4G – không cần WiFi vẫn chơi mượt như thường. TONY02-11O
steroid fat burner
References:
dating-scam.de
seminole hard rock casino tampa
References:
baerbelsgarten.de
buffalo run casino
References:
https://sommer-architekt-warstein.de/
harrah’s rincon casino
References:
fsv-kappelrodeck.de
super scratch programming adventure
References:
dating-scam.de
casinobonus
References:
http://okprint.kz/user/bacondrug9/
play black jack
References:
https://larsen-fenger-3.mdwrite.net
casino sacramento
References:
ondashboard.win
silver reef casino
References:
https://www.bandsworksconcerts.info:443/index.php?epoxycoffee98
play slots online
References:
p.mobile9.com
casino arizona poker
References:
http://09vodostok.ru/
genting casino manchester
References:
https://www.giveawayoftheday.com/
quinault casino
References:
https://molchanovonews.ru/user/adultfender07
the blackjacks
References:
https://doodleordie.com/profile/cornfender43
chateau richelieu
References:
invastu.kz
polis oyunlari
References:
https://hack.allmende.io/s/g25JX4Esb
route 66 casino albuquerque
References:
jobs.emiogp.com
blackjack mountain
References:
https://fachrihelmanto.com/764/nenek-tua-naik-angkot-setan/
salons professionnels
References:
mensvault.men
casino luxeuil
References:
gaiaathome.eu
comanche red river casino
References:
pads.zapf.in
online casino paypal
References:
nhadat24.org
vee quiva casino
References:
https://lovebookmark.date
new buffalo casino
References:
https://tvoyaskala.com/user/trampjudge7/
boogie nights hollywood casino
References:
baby-newlife.ru
salamanca casino
References:
http://www.youtube.com
betvictor slots
References:
socialbookmark.stream
live blackjack online
References:
oren-expo.ru
best casino slots
References:
humanlove.stream
river palms casino laughlin nv
References:
https://atesoglusogutma.com
north brunswick public library
References:
kriminal-ohlyad.com.ua
casino drive furiani
References:
https://alushta-shirak.ru/
wheeling island casino
References:
https://mapleprimes.com/users/wordmagic16
casino yellowhead
References:
http://tropicana.maxlv.ru
Wow that was strange. I just wrote an very long comment but after I clicked submit my comment didn’t show up. Grrrr… well I’m not writing all that over again. Regardless, just wanted to say fantastic blog!
casino washington state
References:
prosmart.by
casino online
References:
celebratebro.in
choctaw casino durant
References:
mydiaryofemotions.com
online betting
References:
http://www.tilaswedding.com
shoshone rose casino
References:
lakestarrsolutionsllc.com
king of prussia casino
References:
https://felicedecor.com/
equipoise steroid
References:
https://rentry.co/6xghuo8i
%random_anchor_text%
References:
https://securityheaders.com/?q=https://hcgbeilstein.de/media/com_articles/anavar_kaufen_4.html
%random_anchor_text%
References:
https://cattletrailers.com.au/author/kisssphynx9/
coast casinos
References:
maxxme.in
best online roulette
References:
http://www.upendogroup.ngdafrica.com/spip.php?article56
steroid cycle results
References:
socialisted.org
schecter blackjack sls c 7
References:
westerndesertsafari.com
newyork newyork casino
References:
https://maxxme.in/
what happens if i side with the institute
References:
jobs.emiogp.com
best slot machines to play
References:
reza-razavi.de
%random_anchor_text%
References:
ajarproductions.com
diamond mountain casino
References:
test.tvorchi.com.ua
%random_anchor_text%
References:
jobboard.piasd.org
moncton nb weather
References:
https://chilipilli.com
new york casino
References:
https://www.bonbini-na-curacao.nl
william hill desktop site
References:
https://wspomozycielka-lodz.pl/?p=745
victoria casino london
References:
fashionandtravelreporter.com
washington state casinos
References:
tarbiyah.alqolam.ac.id
cinema casino auxerre
References:
https://wspomozycielka-lodz.pl/
avi casino
References:
vietex.blog.fc2.com
download casino games
References:
https://innovativeforge.com
genting casino southport
References:
shkolnaiapora.ru
With havin so much content do you ever run into any issues of plagorism or copyright infringement? My blog has a lot of completely unique content I’ve either authored myself or outsourced but it looks like a lot of it is popping it up all over the internet without my permission. Do you know any techniques to help protect against content from being ripped off? I’d definitely appreciate it.
online games casino
References:
https://vivek-desai.com/shortcodes/image-teasers/
premier casino
References:
vivek-desai.com
roulette payout chart
References:
https://cpdbouvxc3m7.blog.fc2.com/blog-entry-376.html
monaco casino
References:
bobojesen.com
pci slots
References:
http://www.elsieisy.com
This blog was… how do I say it? Relevant!! Finally I’ve found something that helped me. Thanks!
casino games slots
References:
http://www.elsieisy.com
pai gow poker online
References:
http://roeseadvocacia.com.br/2025/06/03/hallbarhet-inom-tillverkning-och-design-av-plinko-bollar/
online roulette play roulette and receive $1500
References:
kupe.aetutw.org
new york new york casino las vegas
References:
https://watbosa.ac.th/question/csfhhgggg/
best blackjack app
References:
community.decentrixweb.com
lucky club casino
References:
https://animallovergifts.com/wipes
santa fe casino las vegas
References:
https://cpdbouvxc3m7.blog.fc2.com/blog-entry-295.html
tropicana casino las vegas
References:
http://schlatthof.net
slot machine jackpot
References:
schlatthof.net
hamburg casino
References:
animallovergifts.com
mobile phone casino
References:
raskrussia.ru
online blackjack for money
References:
elsieisy.com
chuzzle deluxe game
References:
innovativeforge.com
geant casino drive
References:
http://schlatthof.net/
blackjack online for money
References:
https://www.realitateavalceana.ro/
riverwalk casino vicksburg ms
References:
community.decentrixweb.com
best blackjack app
References:
yashichi.com
choctaw casino
References:
https://www.elsieisy.com/
gila river casino
References:
http://schlatthof.net/togo-reise-herbst-2019/unser-1-tag-in-togo-3fahrt-von-lome-nach-kpalime
I love what you guys are up too. This sort of clever work and exposure! Keep up the terrific works guys I’ve incorporated you guys to my own blogroll.
It’s in reality a great and helpful piece of info. I am happy that you shared this useful info with us. Please stay us up to date like this. Thank you for sharing.
legal steroids
References:
lovewiki.faith
strongest bodybuilding supplements
References:
peters-yde.technetbloggers.de
best steroids to get big fast
References:
500px.com
Hey there! I know this is kinda off topic however I’d figured I’d ask. Would you be interested in trading links or maybe guest writing a blog post or vice-versa? My site discusses a lot of the same subjects as yours and I think we could greatly benefit from each other. If you might be interested feel free to shoot me an e-mail. I look forward to hearing from you! Superb blog by the way!
best legal cutting supplement
References:
cameradb.review
steroids and libido
References:
sfenglishlessons.com
Every weekend i used to pay a visit this site, because i wish for enjoyment, as this this website conations in fact nice funny data too.
Thank you for another informative blog. Where else may just I get that type of info written in such an ideal means? I’ve a mission that I’m just now working on, and I’ve been at the glance out for such info.
ремонт квартир під ключ метр ремонт квартир ключ ціна
I’ll immediately seize your rss feed as I can’t in finding your email subscription link or newsletter service. Do you have any? Kindly allow me recognize in order that I could subscribe. Thanks.
Found a bride? best places to propose in Barcelona romantic scenarios, beautiful locations, photo shoots, decor, and surprises for the perfect declaration of love. Make your engagement in Barcelona an unforgettable moment in your story.
Проблемы с застройщиком? юрист по дду помощь юриста по долевому строительству, расчет неустойки, подготовка претензии и подача иска в суд. Защитим права дольщиков и поможем получить компенсацию.
Нужен юрист? судебно арбитражный юрист представительство в арбитражном суде, защита интересов бизнеса, взыскание задолженности, споры по договорам и сопровождение судебных процессов для компаний и предпринимателей.
Ищешь кран? кран шаровой под сварку для трубопроводов различного назначения. Надежная запорная арматура для систем водоснабжения, отопления, газа и промышленных магистралей. Высокая герметичность, долговечность и устойчивость к нагрузкам.
парфюмерия и косметика https://elicebeauty.com/parfyumeriya/filter/_m302/
золотое кольцо цена женские https://kolca-pomolvka-msk.ru
Find out the exact https://www.the-weather-in-budva.com today. Detailed 7- and 10-day forecasts, including temperature, wind, precipitation, humidity, and pressure. Up-to-date weather information for Budva on the Adriatic coast for tourists and residents.
I all the time used to read article in news papers but now as I am a user of web thus from now I am using net for articles or reviews, thanks to web.
DOA 3 мы вынесли отдельный пост, чтобы всё важное было в одном месте и без лишней воды. Там собраны основные моменты, которые обычно волнуют игроков: что стоит учитывать перед стартом, какие детали чаще всего обсуждают по бонусным режимам, на что обращать внимание во время сессии и почему у этого слота такая “нервная” динамика. Удобно сначала прочитать пост, а потом уже прийти в группу и обсуждать конкретику – с примерами и своими результатами.
Если вам нужны казино с простой верификацией, ориентируйтесь на прозрачность: заранее прописанные требования, понятные сроки проверки, адекватные инструкции и нормальная поддержка, которая реально помогает, а не отвечает шаблонами. Мы отслеживаем такие варианты и публикуем актуальные подборки и обновления в Telegram – где проще пройти проверку и спокойно играть/выводить без нервов. Ссылка на канал: https://t.me/s/rating_casino_russia/26
References:
T slot bolts
References:
http://www.yangyangsurfingschool.com
References:
Gold casino
References:
jy.uriweb.kr
References:
Casino splendido
References:
shkolnaiapora.ru
Hurrah, that’s what I was seeking for, what a data! existing here at this blog, thanks admin of this web page.
Качественное SEO https://outreachseo.ru продвижение сайта для бизнеса. Наши специалисты предлагают эффективные решения для роста позиций в поисковых системах. Подробнее об услугах и стратегиях можно узнать на сайте
Любишь азарт? https://pfrrt.ru предлагает разнообразные игровые автоматы, настольные игры и интересные бонусные программы. Платформа создана для комфортной игры и предлагает широкий выбор развлечений.
constantly i used to read smaller posts that also clear their motive, and that is also happening with this paragraph which I am reading at this time.
ремонт ванных комнат и санузлов ремонт ванны под ключ
Thank you for the good writeup. It if truth be told was once a amusement account it. Look complex to more introduced agreeable from you! However, how can we communicate?
Pretty section of content. I just stumbled upon your website and in accession capital to assert that I acquire actually enjoyed account your blog posts. Anyway I will be subscribing to your augment and even I achievement you access consistently fast.
ремонт ванной под ключ ремонт ванных комнат в спб
I’ve been surfing on-line more than 3 hours lately, but I never discovered any attention-grabbing article like yours. It is beautiful worth sufficient for me. Personally, if all site owners and bloggers made excellent content as you did, the net will be a lot more helpful than ever before.
Читать далее: https://elicebeauty.com/new/?sort=p.price&order=ASC
References:
Pokies
References:
https://intensedebate.com/people/conetest2
Hi, this weekend is pleasant in favor of me, since this time i am reading this fantastic informative article here at my home.
References:
Roulette flash
References:
http://gojourney.xsrv.jp/index.php?selfleo6
References:
New castle casino
References:
https://500px.com/p/stephensonzkpguldbrandsen
References:
Connecticut casinos
References:
https://controlc.com/9c274232
References:
How slot machines work
References:
https://audiobook.net.pl/user/scarfperson0/
дизайнер загородного дома проектирование домов дизайн интерьеров
Дополнительная информация: https://dezavtor1.amebaownd.com/posts/58226093
References:
Free steroids pills
References:
http://43.143.37.140:20080/ruebenwicken5
References:
How to properly inject steroids
References:
https://clovyn.club/@bruno45s141365
References:
Steroids to gain muscle mass
References:
https://gogs.mkyr.fun:100/latashawby9634
References:
Where to get real steroids
References:
https://git.sayndone.ru/caraplath53167
Hello, i think that i saw you visited my web site so i came to “return the favor”.I am trying to find things to enhance my web site!I suppose its ok to use some of your ideas!!
References:
Steroids alternatives
References:
https://foerderschule-strausberg.de/Schulalltag/index.php/;focus=STRATP_com_cm4all_wdn_Flatpress_18265934&path=?x=entry:entry230124-220637%3Bcomments:1
References:
Bulking steroid pills
References:
https://www.jasminsideenreich.de/Blog/index.php/;focus=STRATP_com_cm4all_wdn_Flatpress_7099662&path=&frame=STRATP_com_cm4all_wdn_Flatpress_7099662?x=entry:entry210626-214845%3Bcomments:1
References:
Male performance issues
References:
https://www.mit-hund-und-katz-per-du.de/Blog/index.php/;focus=STRATP_com_cm4all_wdn_Flatpress_39169460&frame=STRATP_com_cm4all_wdn_Flatpress_39169460?x=entry:entry221010-081404;comments:1
References:
Best website to buy steroids
References:
https://christophorus-sb.de/Aktuelles;focus=TKOMSI_com_cm4all_wdn_Flatpress_22854780&path=?x=entry:entry240424-111901%3Bcomments:1
References:
Best muscle growth supplements 2015
References:
https://jasminsideenreich.de/Blog/index.php/;focus=STRATP_com_cm4all_wdn_Flatpress_7099662&path=&frame=STRATP_com_cm4all_wdn_Flatpress_7099662?x=entry:entry230826-164501%3Bcomments:1
References:
Steroids|alekk00d2yr5zwgei_j3cauqupgquqhozg:***
References:
http://www.use-clan.de/index.php?site=clanwars_details&cwID=64
References:
Are all steroids bad
References:
http://60.247.225.25:3000/bettinamcchesn
Подробности внутри: https://chetyre-gorizonta-novostroy.ru
References:
Fitness youtubers on steroids
References:
http://www.use-clan.de/index.php?site=clanwars_details&cwID=64
References:
Legal performance enhancing drugs bodybuilding
References:
https://www.alpinfitness.com/BLOG/index.php/;focus=W4YPRD_com_cm4all_wdn_Flatpress_3516570&path=&frame=W4YPRD_com_cm4all_wdn_Flatpress_3516570?x=entry:entry200820-213712%3Bcomments:1
дизайн интерьера 3d квартиры дизайнер квартиры
References:
Anabolic steroids buy
References:
http://www.szfzhemmingen.de/Startseite/index.php/;focus=STRATP_com_cm4all_wdn_Flatpress_9648037&path=?x=entry:entry190807-113342;comments:1
This blog was… how do I say it? Relevant!! Finally I’ve found something which helped me. Many thanks!
дизайнеры интерьеров спб купить дизайн проект
References:
Steroids gaining weight
References:
https://jasminsideenreich.de/Blog/index.php/;focus=STRATP_com_cm4all_wdn_Flatpress_7099662&path=?x=entry:entry240107-161729%3Bcomments:1
all the time i used to read smaller articles or reviews that as well clear their motive, and that is also happening with this piece of writing which I am reading here.
It’s perfect time to make some plans for the future and it’s time to be happy. I have read this post and if I could I desire to suggest you few interesting things or suggestions. Maybe you can write next articles referring to this article. I desire to read even more things about it!
Great items from you, man. I’ve keep in mind your stuff prior to and you’re simply extremely magnificent. I really like what you have acquired right here, certainly like what you are saying and the best way in which you are saying it. You’re making it enjoyable and you still take care of to keep it smart. I can not wait to read far more from you. This is actually a terrific site.
I feel this is one of the so much vital info for me. And i am glad studying your article. But should commentary on some common issues, The site taste is great, the articles is really nice : D. Just right process, cheers
Старый паркет? шлифовка паркета в спб профессиональное восстановление деревянного пола без пыли и лишних затрат. Удаляем царапины, потемнения и старое покрытие, возвращаем гладкость и естественный цвет. Используем современное оборудование, выполняем циклевку, шлифовку и лакировку паркета под ключ с гарантией качества и точным соблюдением сроков.
What we recommend now: https://nailsamericaalexandria.com/uncategorized/superheroine-porno-videos-100-percent-free-vids-tiava.html
Recommended reading: https://aramrealtors.com/2026/03/15/mejores-casinos-online-con-manga-larga-retirada-instantanea-de-cualquier-parte-del-mundo-2025/
Expand at the link: https://bazyaft.sepanodp.com/totally-free-4k-pornography-video-and-you-may-mature-gorgeous-sex-video-on-the-fullpornxxx-internet/
Latest publications: https://prosperouswithray.com/casino-live-2025-casinos-online-concepcao-vivo-que-sobre-ambiente-efetivo/
All the latest here: https://wine.mk/grown-porno-videos-hd-pipe-video-clips-xcafe/
Trusted and best: http://www.launchyourbusiness.net/online-casinos-inside-the-fl-2025-top-florida-gambling-enterprise-websites/
I know this web site presents quality depending posts and additional data, is there any other website which presents such things in quality?
References:
Buy anabolic steroids online usa
References:
https://a-taxi.com.ua/user/collarcrow2/
References:
What is the best steroid to take
References:
https://md.un-hack-bar.de/s/hZubfmid42
References:
How do betting odds work
References:
http://amur.1gb.ua/user/clefgirl1/
References:
The blackjacks
References:
https://livebookmark.stream/story.php?title=serioese-online-casino-top-13-casinos-fuer-oesterreich-2026-graz
I for all time emailed this website post page to all my associates, for the reason that if like to read it after that my links will too.
References:
Pro bodybuilders supplements
References:
https://www.ismaning-bleibt-bunt.de/Startseite/index.php/;focus=STRATP_com_cm4all_wdn_Flatpress_50873127&frame=STRATP_com_cm4all_wdn_Flatpress_50873127?x=entry:entry250228-073948;comments:1
References:
Safe steroids for muscle growth
References:
https://www.ferien-sachsen.eu/Ihr-Weg-zu-uns/Saechsische-Schweiz-Blog/index.php/;focus=STRATP_com_cm4all_wdn_Flatpress_6958056&frame=STRATP_com_cm4all_wdn_Flatpress_6958056?x=entry:entry200207-163012;comments:1
References:
The adverse effects of using anabolic steroids are serious because
References:
http://www.tus-oppenau-turnabteilung.de/Aktuelles/index.php/;focus=STRATP_com_cm4all_wdn_Flatpress_4769366&frame=STRATP_com_cm4all_wdn_Flatpress_4769366?x=entry:entry251010-190326;comments:1
References:
Which of the following is a correct description of an anabolic pathway?
References:
https://www.pfadfinder-iserlohn.de/Startseite/index.php/;focus=STRATP_com_cm4all_wdn_Flatpress_11083477&path=?x=entry:entry210823-185852;comments:1
Hello there, just turned into aware of your blog through Google, and found that it’s really informative. I am going to watch out for brussels. I’ll be grateful for those who continue this in future. Lots of other folks might be benefited from your writing. Cheers!
Thank you for the good writeup. It in reality was once a leisure account it. Glance complicated to more introduced agreeable from you! By the way, how can we keep up a correspondence?
Все самое свежее здесь: паркет циклевка метр цена
Самое полезное для вас: шлифовка паркета
For the reason that the admin of this web site is working, no hesitation very rapidly it will be famous,
due to its quality contents.
Great goods from you, man. I’ve understand your stuff previous to and you are just extremely great. I actually like what you’ve acquired here, certainly like what you are stating and the way in which you say it. You make it entertaining and you still care for to keep it smart. I cant wait to read far more from you. This is actually a wonderful site.
I know this web page provides quality based articles and extra data, is there any other web page which gives these stuff in quality?
References:
Symptoms of taking steroids
References:
https://telegra.ph/Anavar10-100tabs-Buy-Online-Anabolics-Shop-EU-02-06-2
References:
Short cut shred
References:
https://rentry.co/u98qqc5r
References:
Steroid medical definition
References:
https://git.zakum.cn/wadeforand715
References:
Deca steroid side effects
References:
http://27.185.43.173:9001/virgilt4897104
References:
Best non steroid muscle builder
References:
http://120.24.175.146:3000/gudrunloftus1
References:
Best legal muscle building supplement
References:
https://www.kingspalace.net/vxlkasey02674
References:
Crazybulk legal steroids
References:
https://pads.zapf.in/s/q6hH6Sz3V6
References:
Best gnc products to get ripped
References:
https://hedgedoc.eclair.ec-lyon.fr/s/nPLhQ1pKx
References:
Riff raff steroids before and after
References:
https://martinsen-mattingly-5.hubstack.net/buy-dianabol-online-in-uk-legal-fast-delivery-and-affordable-price
References:
Injectable steroids side effects
References:
https://git.bp-web.app/joannboreham0
References:
What do steroids treat
References:
https://azds920.myds.me:10004/emma3050249778/3176gitoria.ru/wiki/5-Clenbuterol-Nebenwirkungen%2C-die-Sie-vermeiden-m%C3%B6chten
References:
Buy anabolic steroid online
References:
https://hanyunmedical.com/christinamerci
of course like your web site but you need to test the spelling on several of your posts. A number of them are rife with spelling problems and I find it very troublesome to inform the truth then again I will certainly come back again.
References:
Anabolic steroid sale
References:
https://git.saike.fun:9755/maynardfaith2
References:
Best steroid cycle for bulking
References:
https://www.ikaros.asia/reinat3791606
References:
Anabolic hormone definition
References:
http://git.gkcorp.com.vn:16000/deliajasso0851
References:
Buying illegal steroids online
References:
https://greenopps420.com/@rogeliovoigt30?page=about
References:
Adverse effects of anabolic steroids
References:
https://hijobber.com/employer/clenbuterol-hydrochloride-drug-information-uses-side-effects-chemistry/
References:
Emotional effects of steroids
References:
http://gitea.yiban.com.tw:3030/charlierocher7
References:
Steroids before and after 1 month
References:
https://codes.tools.asitavsen.com/yongkruttschni
References:
Injectable anadrol for sale
References:
http://dns.chenzhao.date:3000/franklinmeaghe
References:
How can you tell if someone is using steroids
References:
https://hearty.rip/nellyreinke38/139.196.103.1145533/wiki/Is-Clenbuterol-Better-Option-for-Bodybuilders
References:
Best cycle for lean mass and strength
References:
https://gpsites.win/story.php?title=buy-dianabol-10mg-usa-delivery-order-today
References:
Did the rock use steroids
References:
http://pattern-wiki.win/index.php?title=cardenashensley5968
References:
Dan bilzerian steroids
References:
https://www.fsv-kappelrodeck.de/Home;focus=TKOMSI_com_cm4all_wdn_Flatpress_22523288&path=?x=entry:entry201008-104128%3Bcomments:1
References:
Winstrol for sale usa
References:
https://jasminsideenreich.de/Blog/index.php/;focus=STRATP_com_cm4all_wdn_Flatpress_7099662&path=&frame=STRATP_com_cm4all_wdn_Flatpress_7099662?x=entry:entry231129-152513%3Bcomments:1
References:
Roulette wheel numbers
References:
https://www.tvbattle.com/index.php?page=user&action=pub_profile&id=289060
References:
Cincinnati casino
References:
https://trade-britanica.trade/wiki/WinSpirit_Online_Australia_Casino_Real_Money_Games_Bonuses_Mobile
References:
Get cut fast
References:
http://47.92.23.195:8418/lornaf1749629/adlr.cig22.com2888/wiki/Dianabol-Dbol-Guide-Dosage%2C-Half-Life-%26-Side-Effects
References:
Testosterone is a steroid
References:
http://47.92.23.195:8418/bertshowers614
References:
Supplements for huge muscle growth
References:
https://www.lizyum.com/@columbuspeake
References:
Best place to buy anabolic steroids online
References:
https://videoasis.com.br/@guctrudy437070?page=about
References:
Which of the following has been found to be a side effect of anabolic
steroid use?
References:
https://git.wikiofdark.art/arielle37f497
References:
Animal test stack
References:
http://81.69.57.215:3000/annarivero8983
References:
Testosteron Tabletten unterstützen
References:
https://sonnik.nalench.com/user/swisscarrot28/
References:
Muskelaufbau Testosteron
References:
https://may22.ru/user/frogeditor58/
References:
Testosteron Tabletten für Männer
References:
https://theoryaugust92.bravejournal.net/testosteron-naturlich-erhohen
pin up casino официальный сайт казино пин-ап
где промокоды алиэкспресс промокод aliexpress 2026
If some one wants expert view on the topic of blogging and site-building after that i recommend him/her to pay a quick visit this web site, Keep up the pleasant job.
смотреть фильмы в качестве киного онлайн
Volvo в Україні https://mirnyid.blogspot.com/2026/03/volvo.html екскаватори, фронтальні навантажувачі та дорожні машини. Надійність, ефективність і сучасні рішення для будівництва. Продаж, підбір і обслуговування техніки для бізнесу.
References:
Flexxlabs
References:
http://8.155.172.147:3001/maxlithgow3130
References:
Is anabolics.com legit
References:
https://git.kooera.com/sherritrenerry
References:
Human growth hormone steroids
References:
https://guateempleos.com/companies/natural-approach-of-yoga-to-increase-testosterone/
References:
Which of the following conditions is often associated with the
abuse of anabolic steroids?
References:
https://ashkert.am/%D5%A1%D5%B7%D5%AF%D5%A5%D6%80%D5%BF%D5%AB-%D5%B0%D5%A1%D5%B4%D5%A1%D6%80/pcos-diet-grocery-list-hormone-balancing-foods/
пин ап официальный сайт https://hr-kafedra.ru
References:
What do all steroids contain in their structure
References:
https://dev-members.writeappreviews.com/employer/10-truths-about-testosterone-what-men-need-to-know/
References:
Alpha mass stack
References:
https://git.refinementservices.com/denadoolan3188
References:
Ways to take steroids
References:
https://tunelifystream.com/geneerdmann808
References:
Mass stack reviews
References:
https://www.beyoncetube.com/@sheltonmoncrie?page=about
References:
What are androgens used for
References:
https://kigalilife.co.rw/author/madonnaspee/
References:
Bulking steroid.cycles
References:
https://hunthub.com.au/@chelseagipson?page=about
References:
Steroid purchase online
References:
http://183.236.243.71:3693/barbragdy2789/git.malls.iformall.com1998/wiki/Testosterone-Esters%3A-Learning-Everything-About-Each-One-of-Them
References:
Legal supplement
References:
https://remooteworks.com/employer/does-going-keto-affect-testosterone-levels/
References:
Insane muscle women
References:
https://koonis.net/margomurry3483
References:
Anabolic steroids can be ingested in which of the following ways
References:
https://git.vezpi.com/vera6166987774
References:
What is a dangerous effect of anabolic steroids
References:
https://video.silverwolfstudios.com/@walterein55829?page=about
References:
Extreme muscle building supplement
References:
https://joblinksolution.org/employer/testosterone-and-insulin-resistance-in-men-evidence-for-a-complex-bi-directional-relationship/
References:
Herbal steroids for bodybuilding
References:
http://81.70.179.79:3000/florinepeeples
References:
Human grade testosterone
References:
https://ai-db.science/wiki/User:AlbertoBard9
References:
Cutting on deca
References:
https://part-time.ie/companies/blood-test-logging/
References:
Rapid tone diet pills reviews
References:
https://mozillabd.science/wiki/Testosterone_Esters:_Learning_Everything_About_Each_One_Of_Them
References:
Anabolic steroids body building
References:
https://dev.modelhub.org.cn/manuelatruscot
References:
Best muscle growth supplements 2015
References:
https://www.findinall.com/profile/karlhungerford
References:
Do steroids make your penis bigger
References:
http://gitea.yiban.com.tw:3030/essielukis6792
You said it very well..
References:
https://actualites.cava.tn/user/canlyric2/
Helpful postings, With thanks!
References:
https://bom.so/mssr8b
References:
Instant Casino mobile spielen
References:
https://myenglishguide.com/members/spongeparty7/activity/11058/
References:
Instant Casino Auszahlung sofort
References:
https://pantywhale65.bravejournal.net/top-spielautomaten-und-hohe-boni-fur-deutsche-spieler
References:
Instant Casino Freispiele
References:
https://undrtone.com/monkeyjason3
References:
Instant Casino Spiele
References:
https://telegra.ph/Casino-Ohne-Einzahlung-Echtgeld-2026-Gewinne-Direkte-Auszahlung-Enns-04-04
References:
Instant Casino Live Chat
References:
https://classifieds.ocala-news.com/author/goalbass21
References:
Instant Casino Auszahlungsdauer
References:
https://wikimapia.org/external_link?url=https://hanffidel.de/
References:
Instant Casino Auszahlungsdauer
References:
https://aryba.kg/user/collarpuma4/
References:
Instant Casino Willkommensbonus
References:
https://diego-maradona.org/user/whitewrench9/
References:
Instant Casino Treuepunkte einlösen
References:
https://adsintro.com/index.php?page=user&action=pub_profile&id=833709
Нужны заклепки? заклепки вытяжные алюминиевые 3.2 прочный крепеж для соединения деталей. Алюминиевые, стальные и нержавеющие варианты. Надежность, долговечность и удобство монтажа для различных задач и конструкций.
References:
Instant Casino Konto erstellen
References:
https://firsturl.de/ormZ4Pv
References:
Instant Casino Auszahlung sofort
References:
https://undrtone.com/blousemint1
References:
Instant Casino Jackpot Spiele
References:
https://prpack.ru/user/studygirdle0/
References:
Instant Casino Willkommensbonus
References:
http://semdinlitesisat.eskisehirgocukduzeltme.com/user/egyptpush4/
References:
Instant Casino Slots
References:
https://p.mobile9.com/timertuna4/
References:
Gewinne bei Instant Casino auszahlen
References:
https://rentry.co/it7vzhb6
References:
Instant Casino Willkommensbonus
References:
https://blogfreely.net/carboncanada66/instant-casino-test-wie-serios-ist-dieses-krypto-casino-wirklich
References:
Instant Casino Bonus ohne Einzahlung
References:
https://hedgedoc.eclair.ec-lyon.fr/s/Z0bRFfHfE
References:
Instant Casino VIP Programm
References:
http://xn--l1ae1d.xn--b1agalyeon.xn--80adxhks/user/lotiontuna6/
References:
Instant Casino Bonus ohne Einzahlung
References:
https://diego-maradona-ar.org/user/dangerrotate0/
References:
Instant Casino Bonus ohne Einzahlung
References:
https://telegra.ph/Online-Casino-mit-den-schnellsten-Auszahlungen-in-Deutschland-02-22
References:
Live blackjack online
References:
https://pattern-wiki.win/wiki/Best_Online_Casino_for_Aussies
References:
Instant Casino Spielanbieter
References:
https://squareblogs.net/kalecut78/erstellen-sie-ihr-konto-and-spielen-sie
References:
Instant Casino Treuepunkte einlösen
References:
https://king-wifi.win/wiki/Instant_casino_auszahlung_DE_Spielen_im_online_casino_Instant_Deutschland
References:
Echtgeld casino erfahrungen
References:
http://www.qazaqpen-club.kz/en/user/spongeshow85/
References:
Androgenic steroids definition
References:
https://socialbookmark.stream/story.php?title=homeda-clenbuterol-c-30-globuli-guenstige-preise
References:
Ameristar casino st charles mo
References:
https://atesoglusogutma.com/user/harpparty3/
References:
Steroids in athletes
References:
https://topbookmarks.cloud/item/596088
References:
Where can i get real steroids
References:
https://hackmd.okfn.de/s/rkETA-rsbe
References:
Instant Casino VIP Programm
References:
https://dreevoo.com/profile.php?pid=1166506
References:
Valley forge casino
References:
https://rentry.co/o73u25y9
References:
Instant Casino PayPal einzahlen
References:
https://bbs.pku.edu.cn/v2/jump-to.php?url=https://hanffidel.de/
rent office new york rent nyc office space
References:
Instant Casino Spielanbieter
References:
https://www.24propertyinspain.com/user/profile/1413660
References:
Blackjack mulligan
References:
http://ed.coop/forums/users/atomarcher95/
References:
Merkur online casino
References:
https://pads.zapf.in/s/xY5iObWw0o
Good day! I know this is kinda off topic nevertheless I’d figured I’d ask.
Would you be interested in trading links or maybe guest authoring a blog post or vice-versa?
My site discusses a lot of the same subjects as yours and I believe we could greatly benefit from each other.
If you happen to be interested feel free to shoot me an e-mail.
I look forward to hearing from you! Superb blog by the way!
References:
Instant Casino Live Casino
References:
https://eskisehiruroloji.com/sss/index.php?qa=user&qa_1=pointstick8
References:
Craze pre workout banned
References:
https://hack.allmende.io/s/f99w1mEXf
References:
Steroid body vs natural body
References:
https://mozillabd.science/wiki/Dein_Weg_zu_sicherem_AnavarKauf_Alles_was_du_wissen_musst
References:
Legal consequences of anabolic steroids
References:
https://cameradb.review/wiki/Clenbuterol_Spiropent
References:
Buying legal steroids
References:
https://pad.geolab.space/s/kcgzEbBOz
References:
Instant Casino Freispiele
References:
https://lospromotores.net/author/hosegram3/
References:
Did arnold use steroids
References:
https://maxtravelagencys.com/employer/where-to-buy-trenbolone-what-you-need-to-know/
References:
Anavar female before and after
References:
https://em-drh.com/employer/how-to-increase-testosterone-naturally-after-40-proven-methods/
References:
Best muscle bulking supplements
References:
https://internskill.in/companies/human-growth-hormone-hgh-benefits-risks-and-uses/
References:
Hgh steroid cycles
References:
https://portal.shcba.org/employer/appetite-suppressants-types-and-side-effects/
References:
Is anabolic steroids illegal
References:
https://career.abuissa.com/employer/how-to-access-weight-loss-drugs-if-you-cant-afford-them/
References:
How are anabolic steroids made
References:
http://dailyplaza.co.kr/bbs/board.php?bo_table=1302&wr_id=231566
References:
Anavar stacks
References:
https://tsnasia.com/employer/omnitrope-injection/
References:
Beta-sitosterol amazon
References:
http://gsoot.co.kr/bbs/board.php?bo_table=sub07_02&wr_id=41817
References:
Prohormone steroids
References:
http://play.kkk24.kr/bbs/board.php?bo_table=online&wr_id=346448
References:
Bockshornklee Testosteron
References:
https://best-mcmahon-7.technetbloggers.de/testosterone-cypionate-injection
принято на ответственное хранение ответственное хранение
нужно ответственное хранение https://otvetstvennoe-hranenie-sklad.ru
References:
Anabolic steroids in sports
References:
https://md.swk-web.com/s/oe_Yp6E3g
References:
Steroid world
References:
https://stackoverflow.qastan.be/?qa=user/healthsailor20
References:
Side effects of steroids for women
References:
https://graph.org/What-Is-Trenbolone-Acetate-Breaking-Down-Dosage-Guidelines–Safety-Tips-02-05
авторский дизайн интерьера https://dizayn-kvartir-msk.ru
References:
Over the counter anabolic steroids
References:
https://dreevoo.com/profile.php?pid=1053846
This info is invaluable. Where can I find out more?
References:
Pills to gain muscle
References:
https://mes-favoris.site/item/597095
References:
Buying steroids online
References:
https://rentry.co/xwvkenif
References:
Legal workout supplements
References:
https://www.ozodagon.com/index.php?subaction=userinfo&user=jamnorth95
References:
Word for also
References:
https://fournier-feldman-2.thoughtlanes.net/testosterone-propionate-granules-organotherapie-sarcode-boiron
Do you trade cryptocurrencies? ai crypto trading with bitkelttrade automate your transactions and earn passive income. Smart algorithms analyze the market and help you make decisions. Increase your income and reduce risks with modern technology.
References:
Best steroid for strength and cutting
References:
https://cameradb.review/wiki/Dianabol_Online_Kaufen_TOP_Preis_Rezeptfrei_in_Deutschland
References:
What are the risks of using anabolic steroids
References:
https://onlinevetjobs.com/author/oakcare53/
большие флаги на заказ https://flag-zakaz-spb.ru
We’re a bunch of volunteers and opening a brand new scheme in our community. Your web site offered us with valuable info to work on. You have done an impressive task and our whole neighborhood will probably be grateful to you.
I do consider all of the ideas you’ve offered on your post. They are really convincing and will definitely work. Nonetheless, the posts are too quick for novices. May just you please prolong them a little from subsequent time? Thank you for the post.
Хочешь оригинальную подушку? подушка дакимакура японская купить комфорт и уют для сна. Длинная форма, мягкий наполнитель и стильные принты. Отлично подходит для отдыха и расслабления.
Нужен пластический хирург? медицинский центр пластической хирургии современные операции и эстетические процедуры. Опытные хирурги, безопасные методики и индивидуальный подход. Консультации, диагностика и качественный результат.